You already know that installing Valence on IBM i and using it internally within your corporate network is fast and easy. Your company’s employees should also be able to access your Valence instances through a standard VPN connection when they are located outside of your company’s physical network. But what about when you need to provide secure access to Valence apps to the outside world directly through the Internet?
One common example of this kind of external access being applied is a Valence-based supplier portal, in which your company’s vendors can log in to access specialized apps on your system to bid on quotes, view anticipated requirements for future raw material orders, or even to update shipping information on current or upcoming POs.
Another example is a customer portal, where your company’s customers may inquire on order status, view shipping details, or even place an order directly on your system. While this kind of outside exposure to your IBM i-based system can be tremendously useful and help give your company a competitive advantage, it’s critical that you take the appropriate steps to secure your system from nefarious entities on the web.
Using SSL is a big part of that. This post will walk you through the entire process of setting up your IBM i server to support external Internet access to a Valence instance through the Internet, including the steps required to purchase and apply an SSL certificate. A couple important things to consider before getting started:
- CNX recommends that you dedicate a specific Valence instance for external Internet access (you can use Valence’s Instance Manager app to easily create a new instance). This allows you to keep your internal and external Valence use separated, even if they share the same apps. Access to the outside can thus be shut down at any time without affecting your internal users by simply stopping the external instance.
- Some steps in this process will require configuration changes to your network firewall and DNS. You may need assistance from your company’s network administrator to apply these settings adjustments.
Step 1: Assign External Address and Configure NAT (Network Address Translation)
Your network administrator will first need to assign a new external IP address and configure NAT through your company’s firewall so the new external IP address is mapped to the internal IP address of your IBM i. For security, it’s important to use port forwarding and not just open all ports through the firewall.
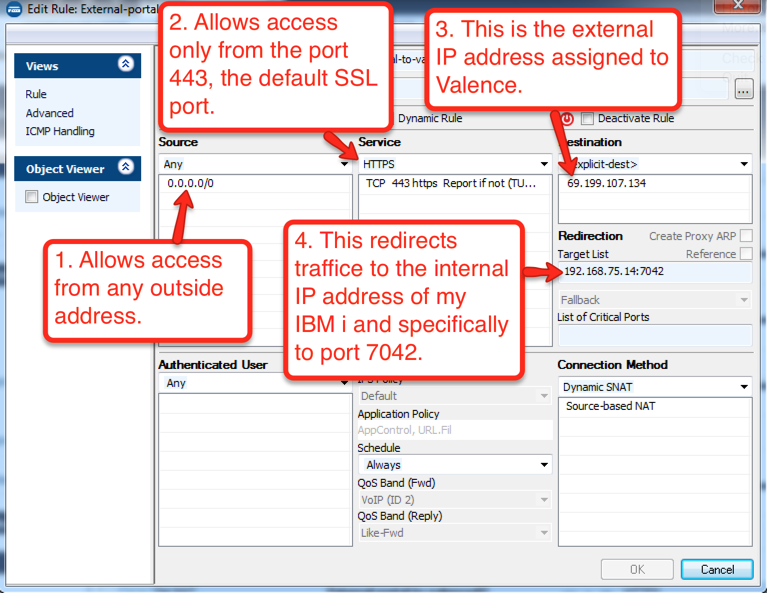
For example, standard https runs on port 443. If your Valence instance runs internally on port 7042, your network administrator will need to open up port 443 externally and forward it to 7042 internally. Since we’re installing an SSL certificate, this traffic will be encrypted, Valence will be accessible and no services on any other ports will be externally available.
How to configure NAT is highly dependent on the type of network equipment you have. Here at CNX we use a Barracuda Firewall, and Figure 1 below shows the NAT configuration for the example we will use in this post. You can use this as a general guide as you apply a NAT configuration to your own firewall.
Step 2: Configure DNS (Domain Name Service)
Decide on a host name for your external Valence instance. In the example for this document, we want to get to our Valence instance from the Internet via “portal.cnxcorp.com”. The first portion of the address (the host name) can be anything as long as it’s not already used in your network, while the second part (the domain) should be your company’s main domain name. Once you’ve picked a name, have your network administrator make an entry on your company’s DNS server to map your new address to the external IP address assigned in Step 1.

Step 3: Use DCM (Digital Certificate Manager) to Make a Certificate Request
In order to get an SSL certificate from a third party certificate authority (described further in Step 4) you first need to go into your IBM i’s DCM and generate a request. This will give you a long string of characters which represents the request that you will paste into the certificate authority’s ordering system.
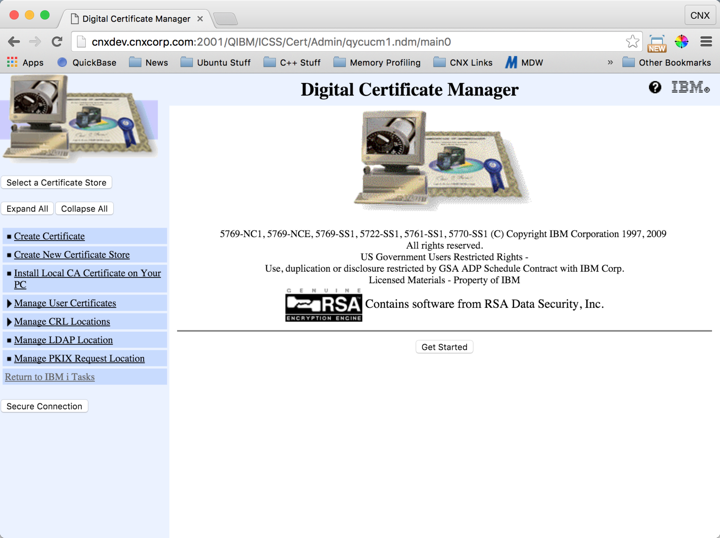
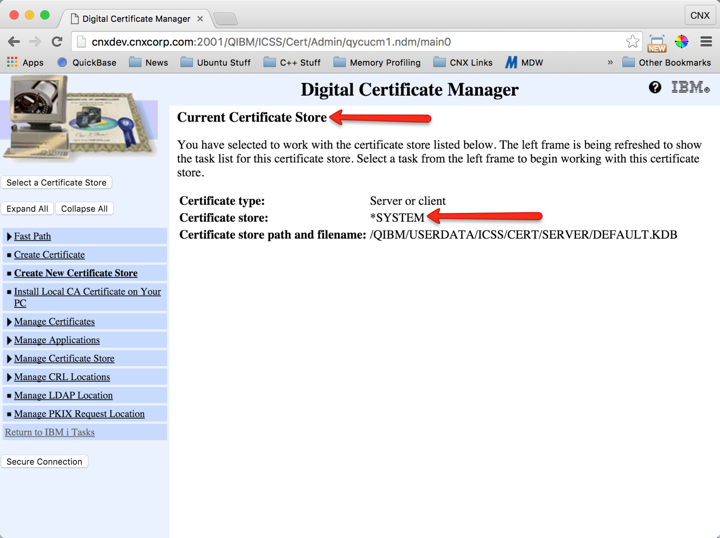
From your browser go to http://[your_system_ip_or_name]:2001, then click on the DCM link. You could also access the page directly by going to http://[your_system_ip_or_name]:2001/QIBM/ICSS/Cert/Admin/qycucm1.ndm/main0. You will receive a popup login screen, where you should log in with QSECOFR or any profile with *IOSYSCFG authority. You should see a page similar to the one shown here in Figure 3:
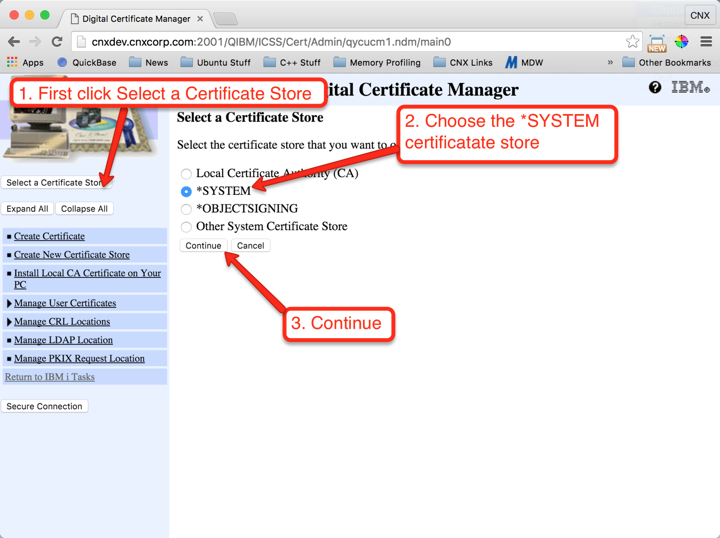
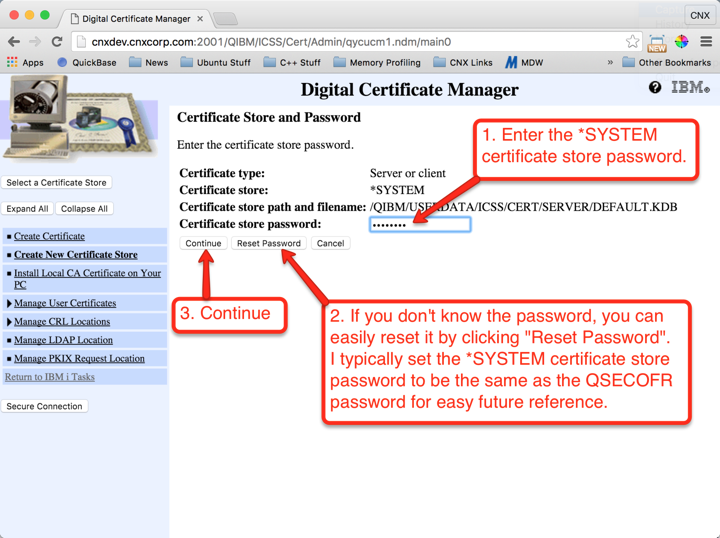
Operations that you perform on certificates are against the currently-selected certificate store. We always want to use the *SYSTEM certificate store. Follow the instructions shown in Figures 4 through 6 to set *SYSTEM as the current certificate store.
IMPORTANT: If you don’t see the *SYSTEM certificate store in the list, use the “Create New Certificate Store” from the left menu and create the *SYSTEM store, then start the process over beginning with Figure 4.
Now that the *SYSTEM certificate store is set, we can create the request. Follow the instructions shown below in Figures 7 through 10 to generate the request:
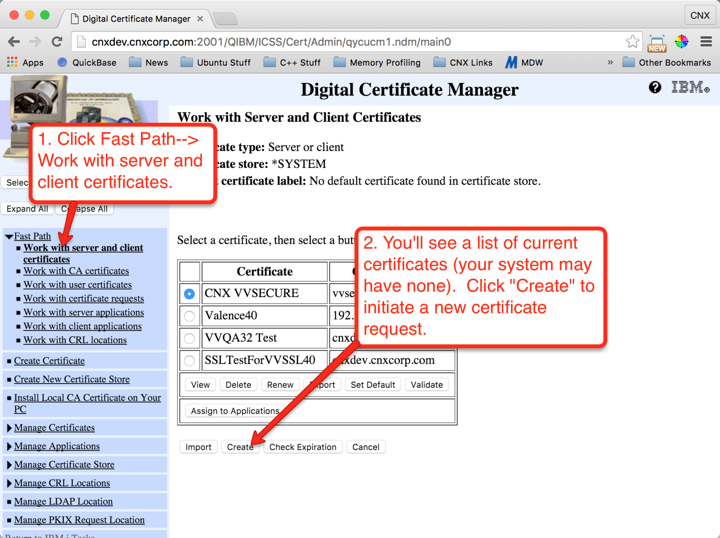

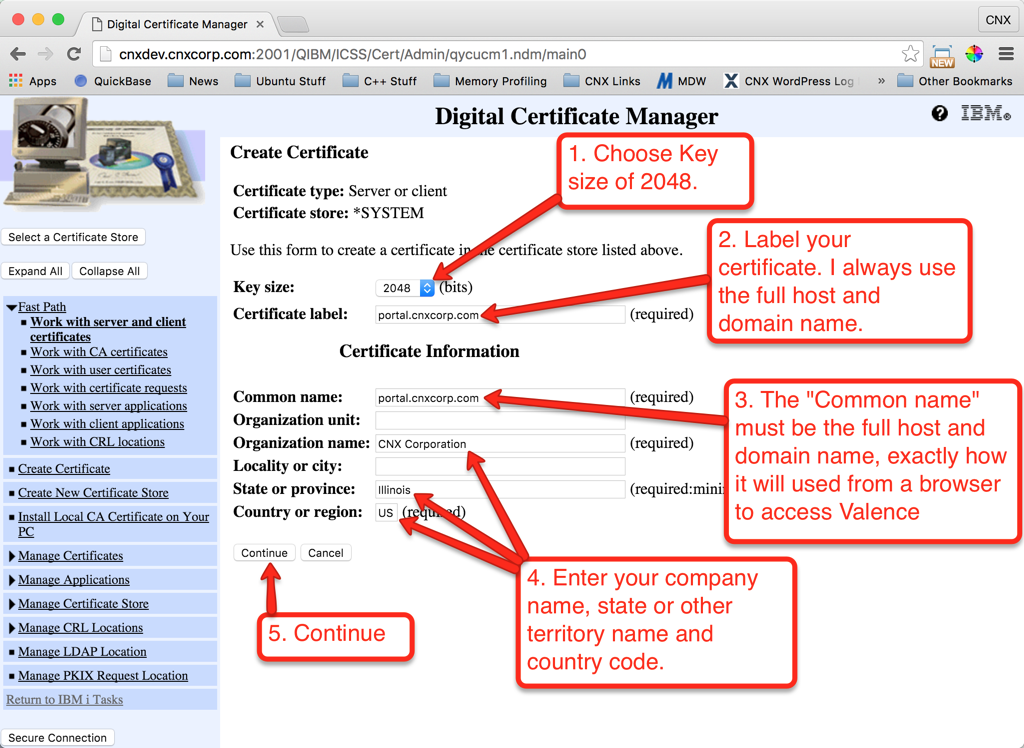
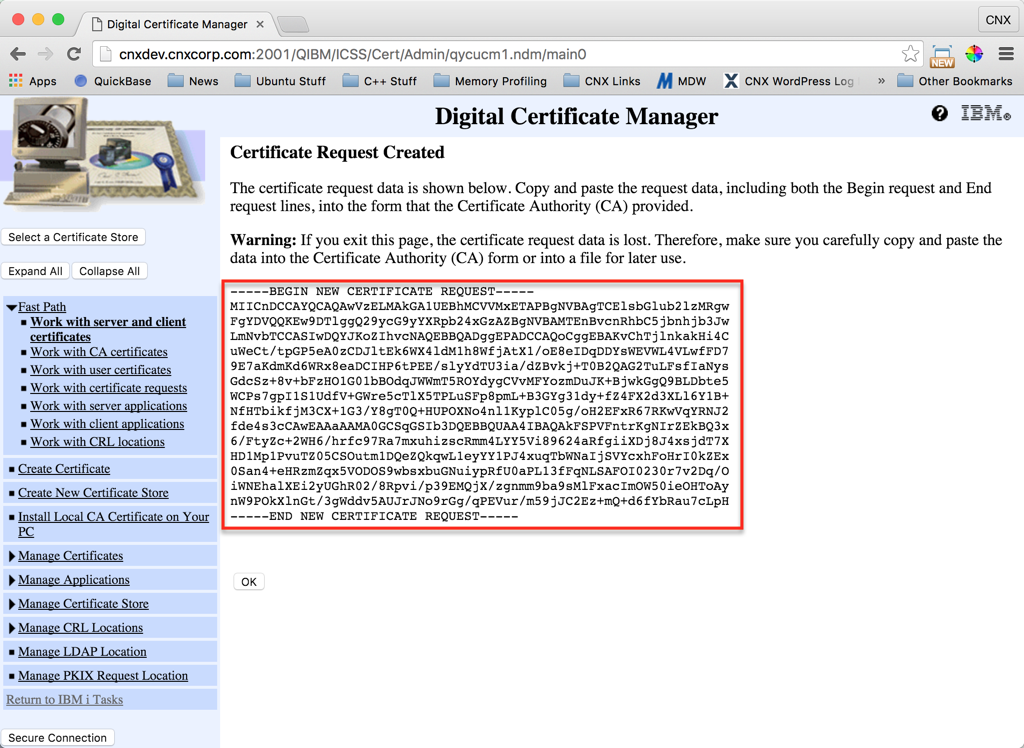
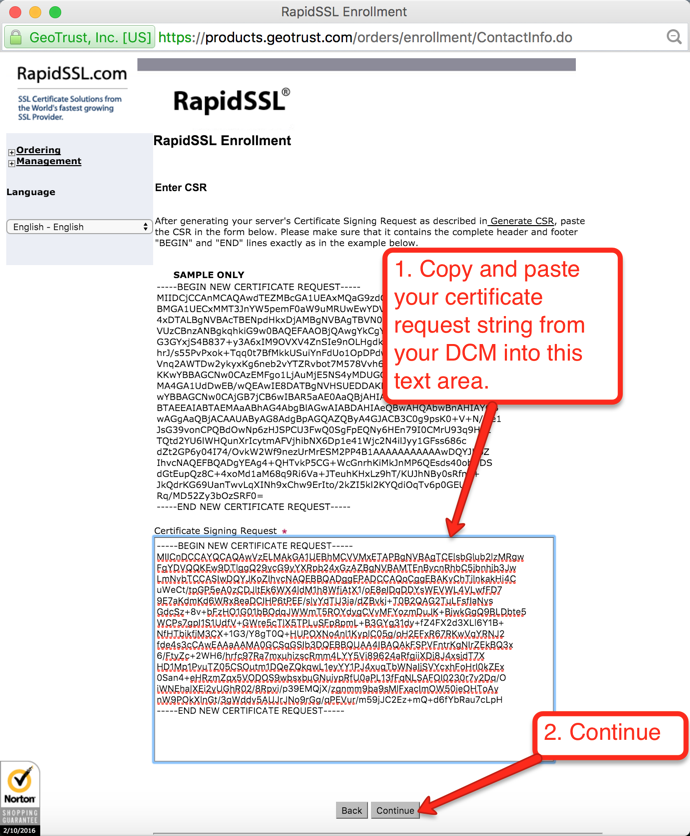
Figure 10 shows the completed request page. Leave this page open, or copy the certificate request string to your clipboard for use in the next section. When copying the certificate request string, be sure to include the first and last line that indicates the start and end of the request including all the dashes, as delineated in the red box in figure 10 below:
Step 4: Obtain an SSL Server Certificate from a Certificate Authority
A certificate authority is a third party organization that can issue secure certificates. The certificate authority is also “trusted” by your browser to authenticate the validity of these certificates when they are presented by a server. There are many certificate authorities you can choose from. Some well known ones are VeriSign, Entrust, GoDaddy, RapidSSL, etc.
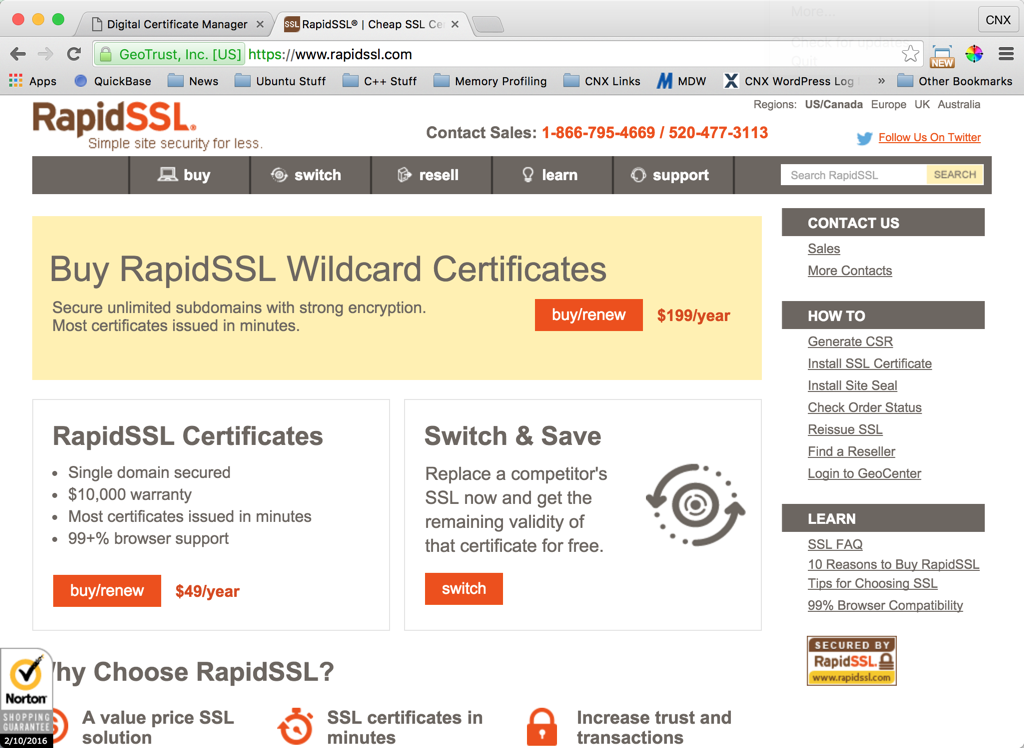
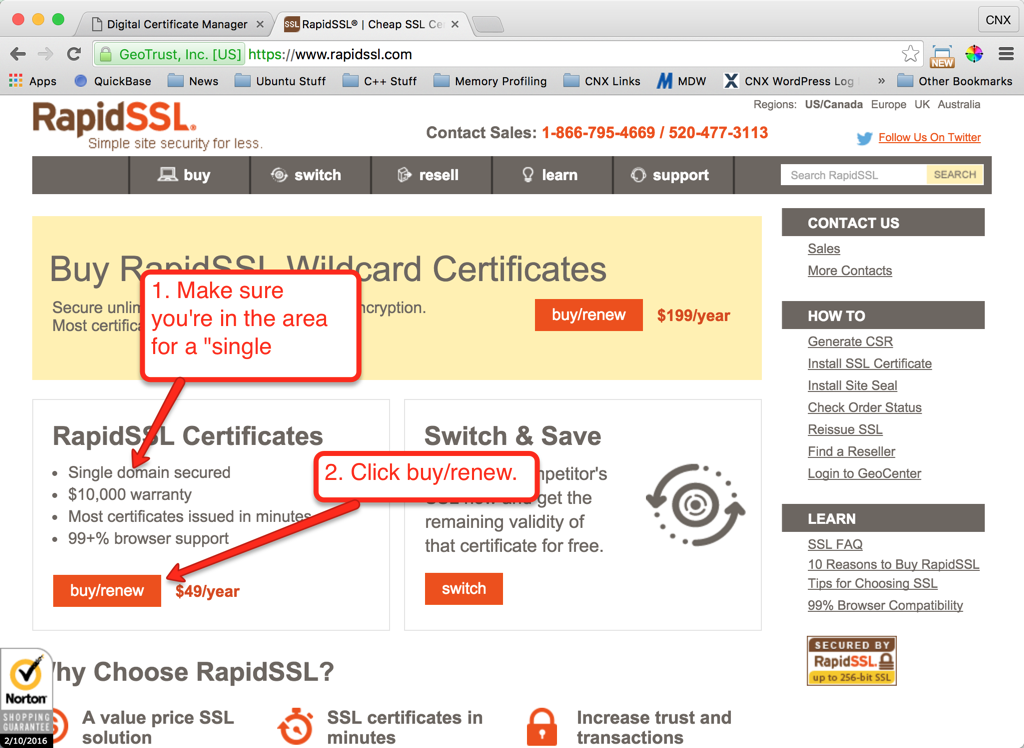
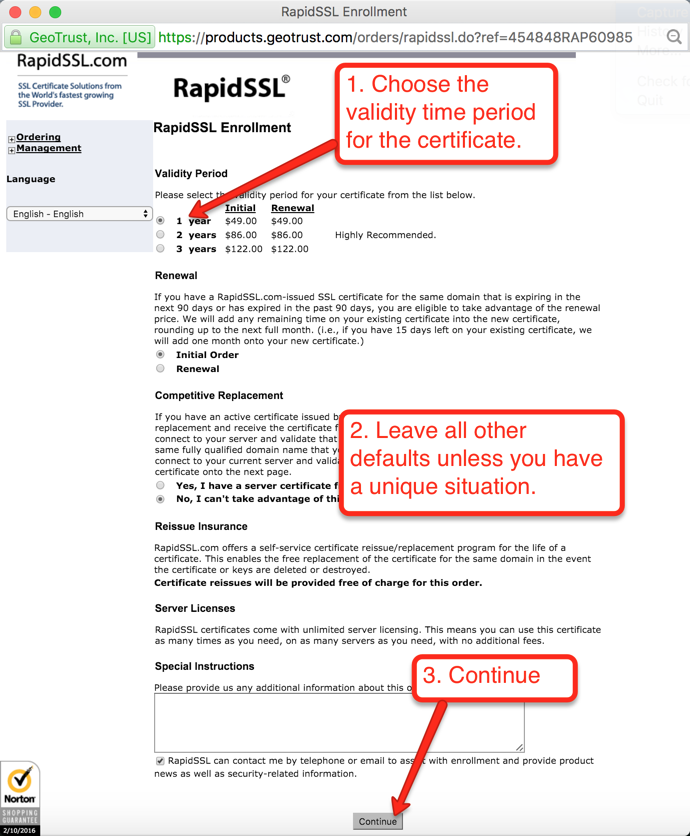
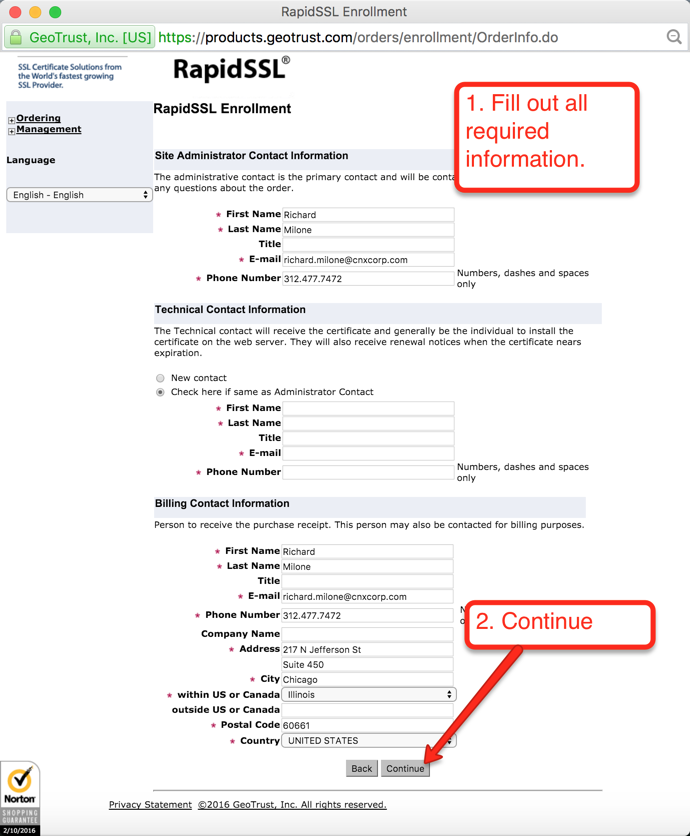
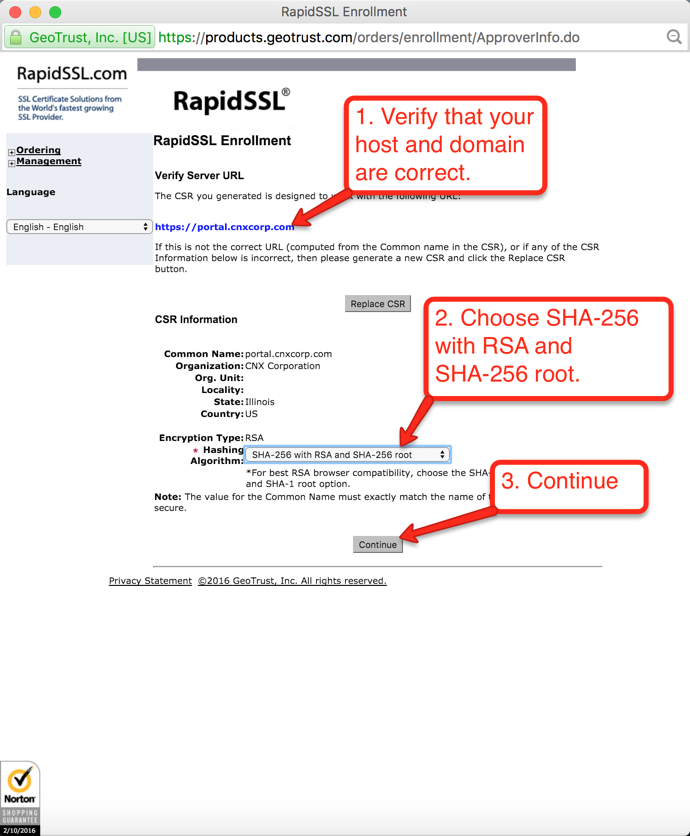
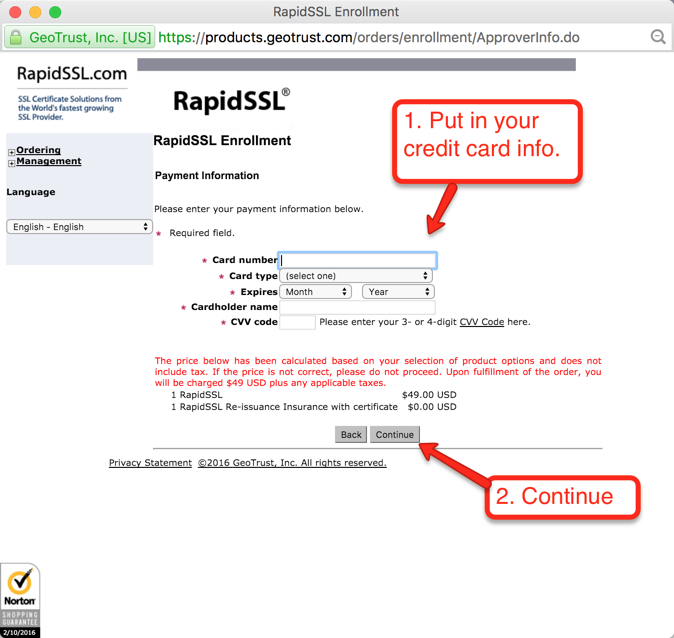
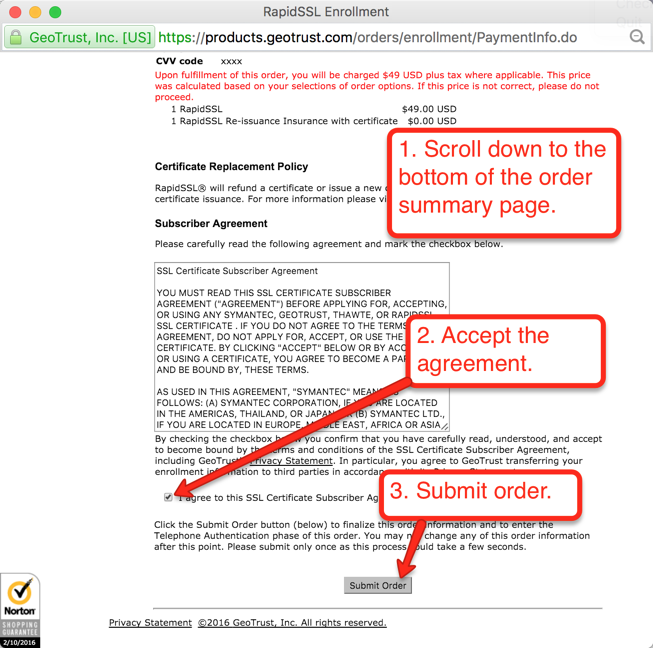
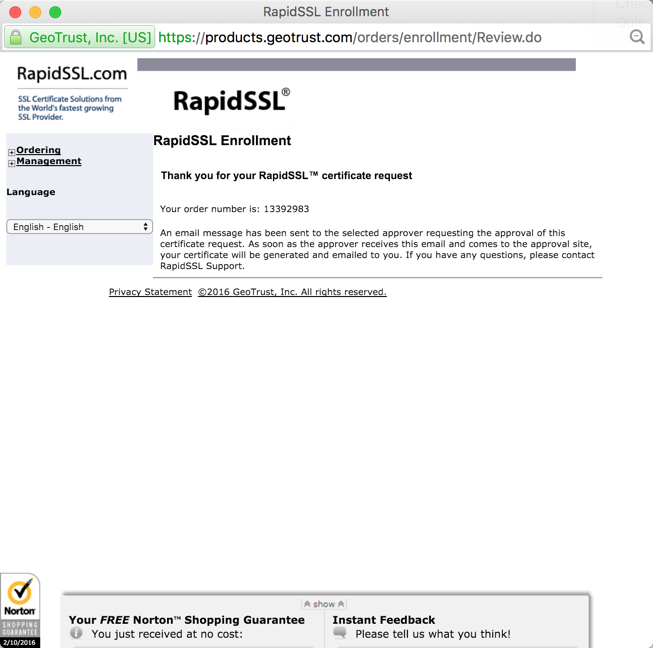
In the example here we will use RapidSSL because it’s inexpensive and works as well as the others. If you use a different certificate authority you should still be able to use the following workflow as a guide — the general steps should be somewhat similar. Start by going to rapidssl.com (or to the main page of your certificate authority) as shown below in Figure 11, then follow the instructions shown in Figures 12 through 20 to purchase the certificate:
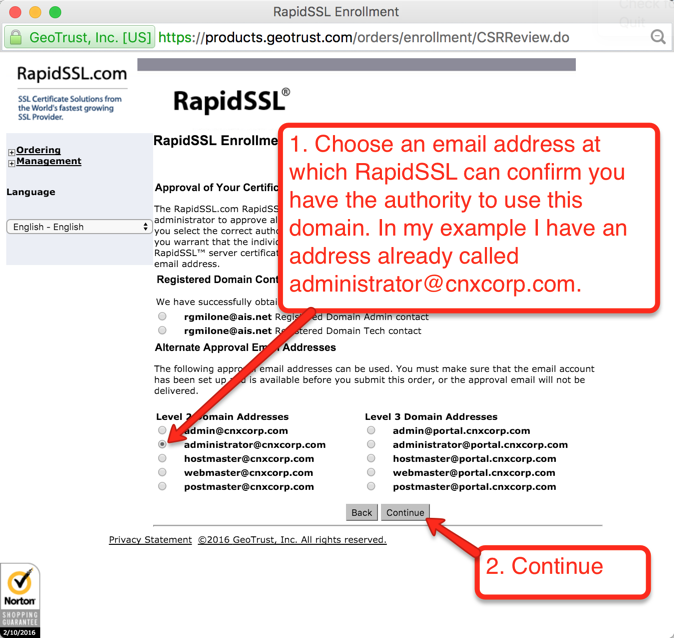
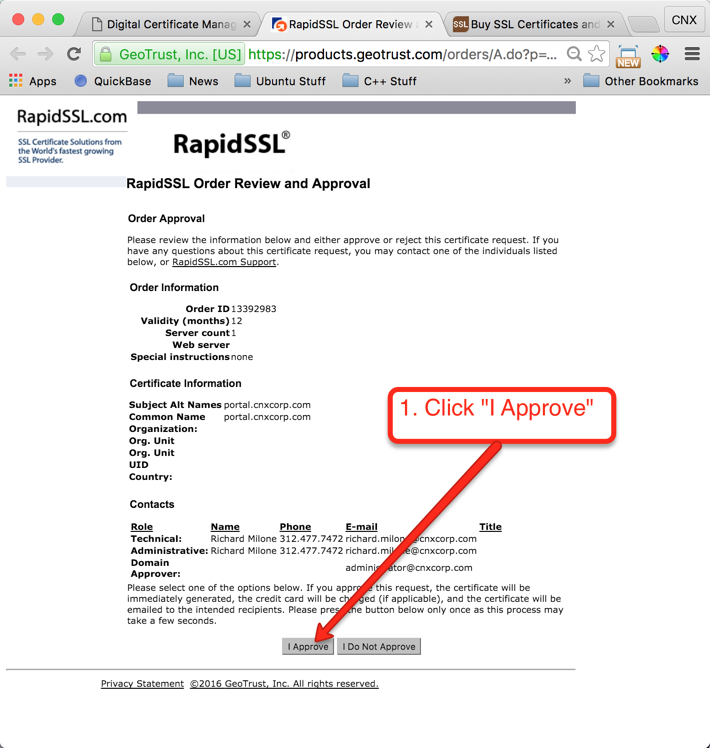
Once your order is placed, the certificate authority will attempt to validate that you are authorized to place the order for the given domain. RapidSSL uses a combination of email authentication and voice authentication. Check the account for the email address verfication you selected, as shown in Figure 17. There should be an email asking to verify the certificate order. When you click the link to verify you will get to a page similar to the one depicted below in Figure 21. Just click the “I Approve” button.
It’s also possible you will be asked on-screen or via email to do a voice authentication. This is an easy process where you put in your phone number, an automated system calls you, and you follow the prompts on-screen to leave a voice print to further validate the order.
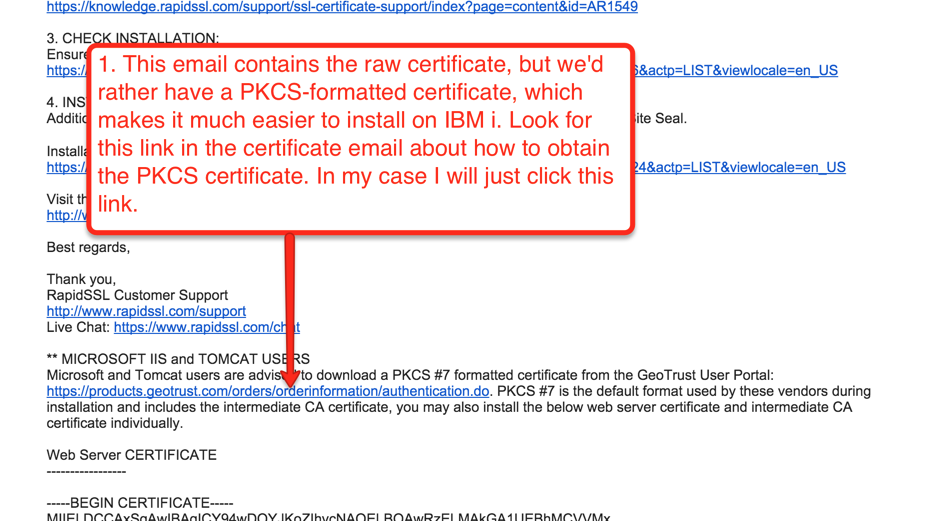
Once all verifications are complete you will receive a final email with your certificate. The email will normally contain a text string with the completed certificate, but this is difficult to import into the IBM i’s DCM, especially if you’re ordering from a certificate authority that is not known by default to DCM.
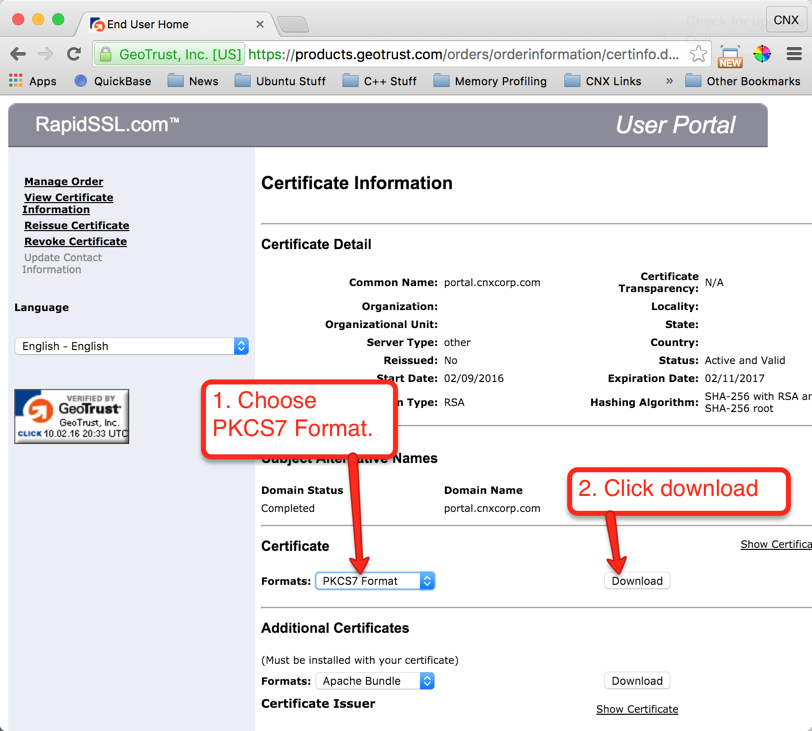
To make things much easier, look in the email for a link to access the PKCS7-type formatted certificate, which includes all necessary information for DCM in one file. A sample of this email and link from RapidSSL is shown in Figure 22. After following that link, complete the instructions shown in Figure 23 to download the PKCS7 formatted certificate.
IMPORTANT: After you download the certificate file, zip it with a zip utility so that it will be recognized as a binary format for upload to the IBM i ifs.
Step 5: Upload the PKCS7 Certificate to the IFS
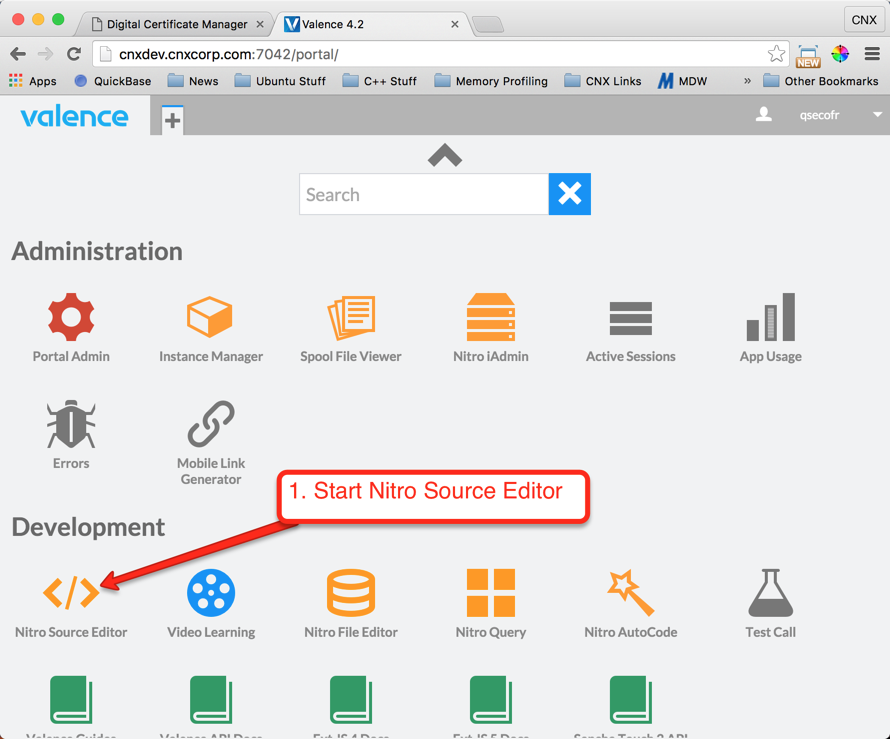
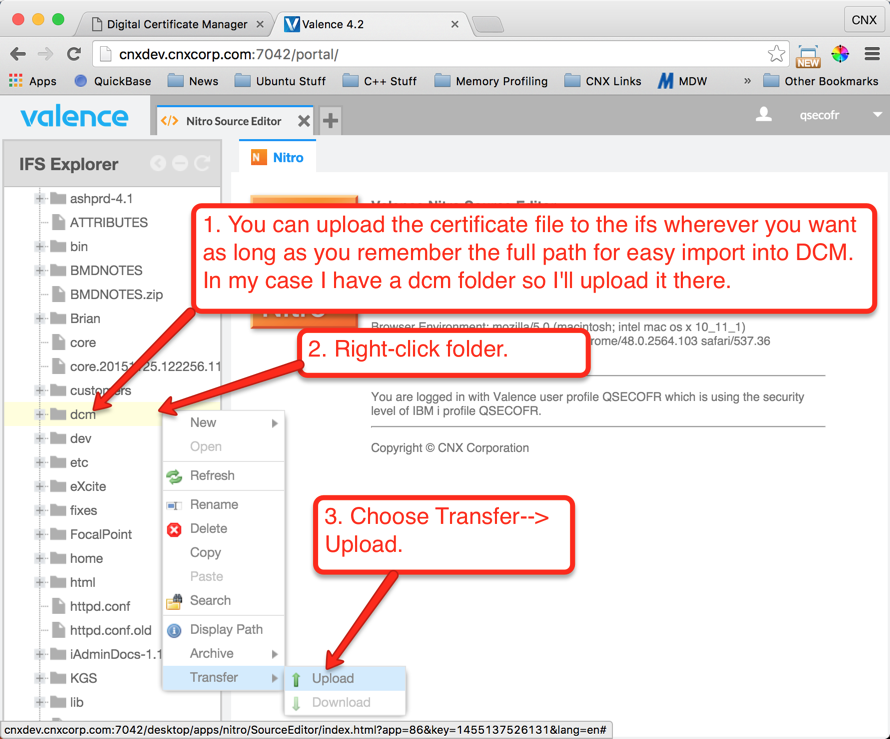
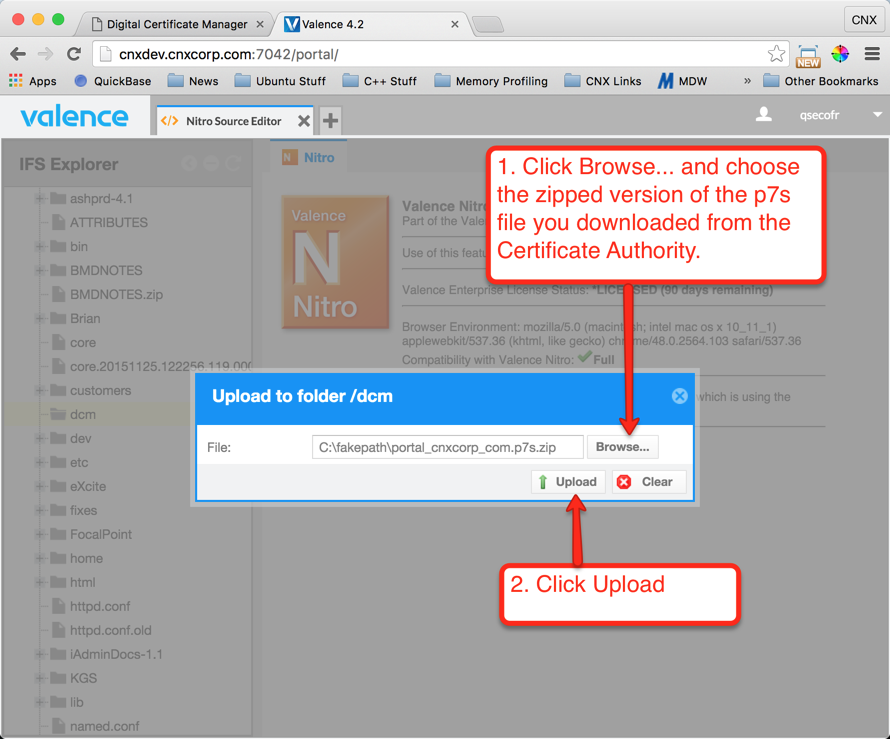
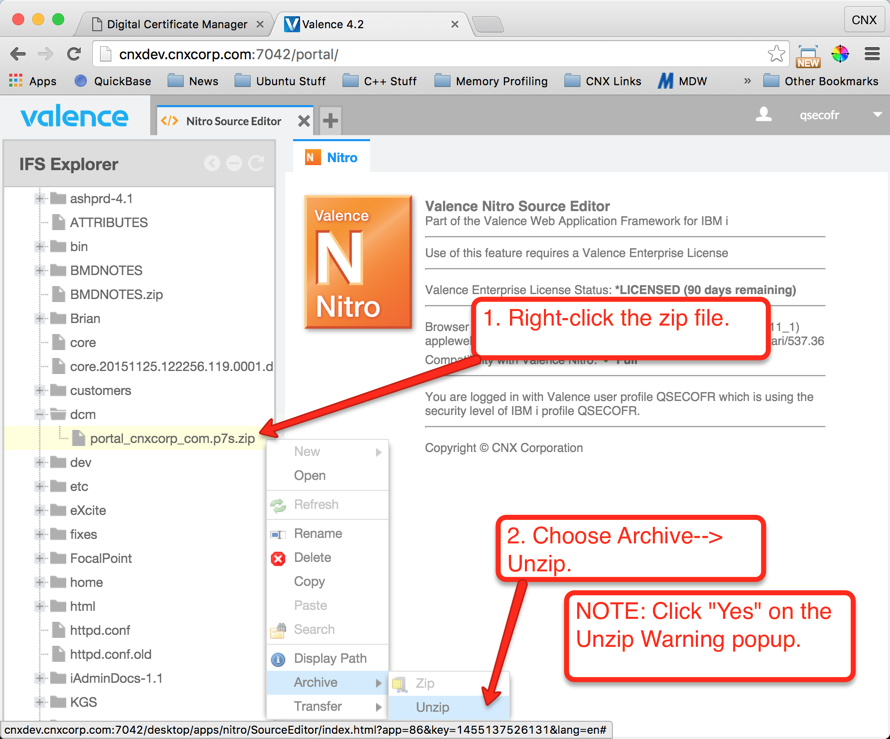
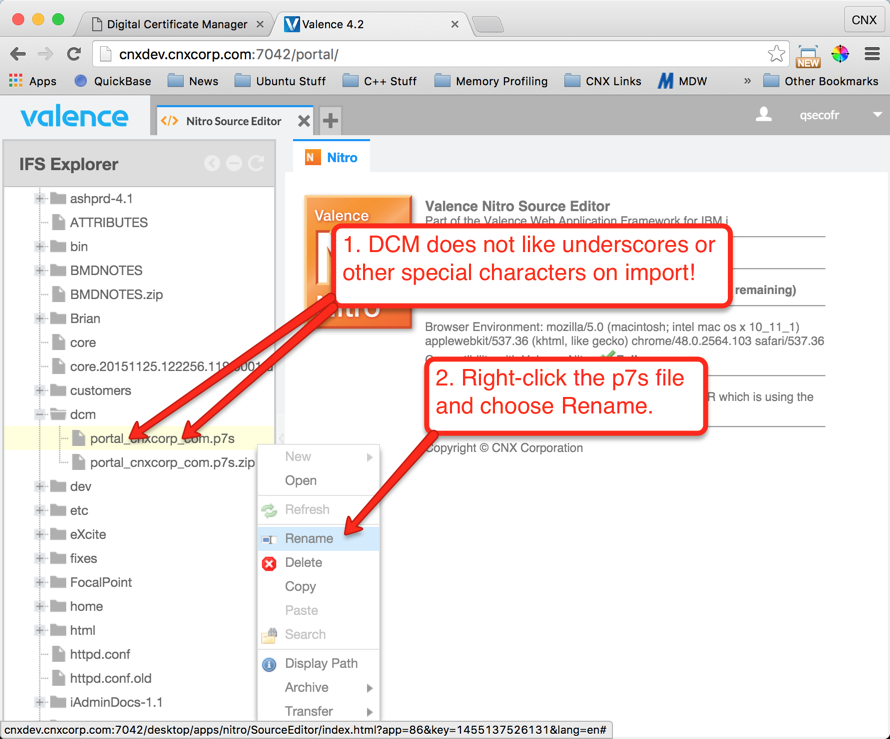
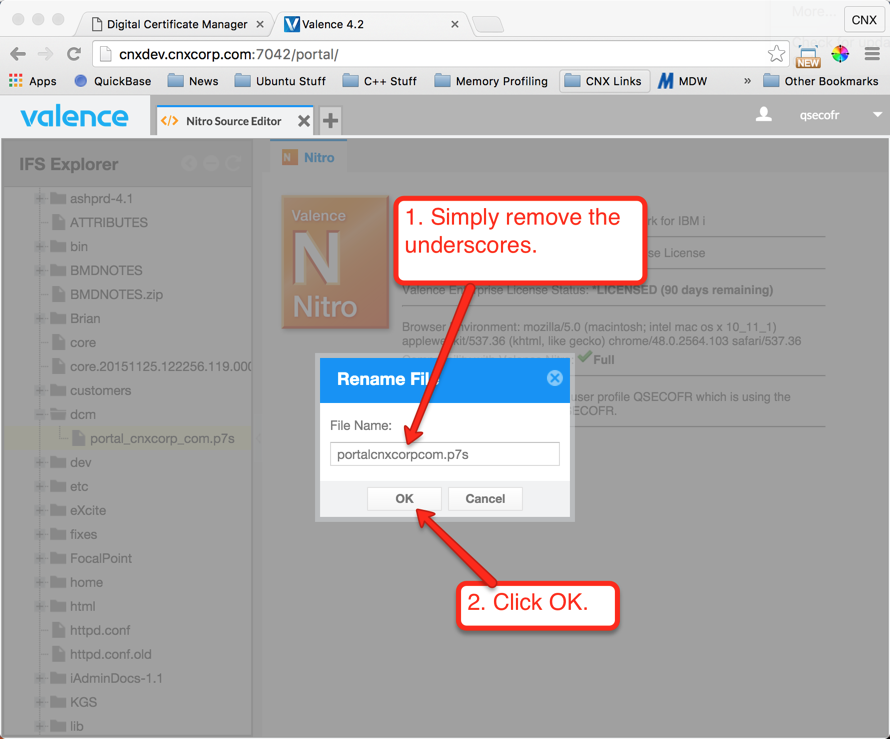
Now that we have the server certificate from RapidSSL, we need to get it to the IFS so we can import it into DCM. You can use the Valence Nitro Source Editor to upload the zipped version of the certificate file to the IFS, or you could simply FTP the file or use a mapped drive. The instructions shown below in Figures 24 through 29 demonstrate how to complete the upload using Valence:
Step 6: Import the Server Certificate to DCM
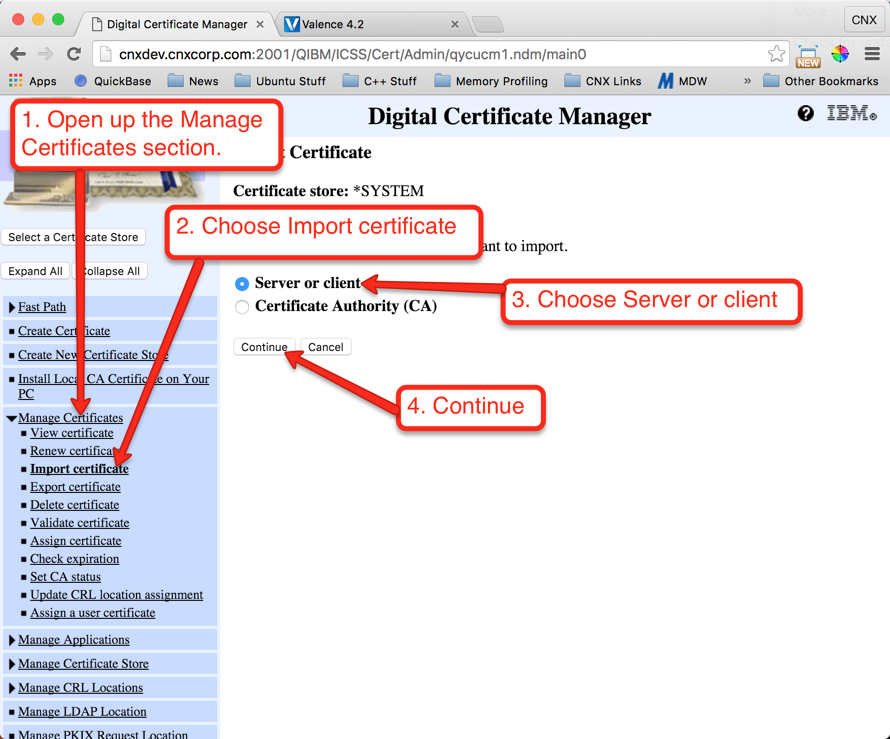
Now it’s time to go back to your IBM i’s DCM and import the server certificate you uploaded to the IFS in the previous step. Follow the instructions shown below in Figures 30 through 33 to complete the import:

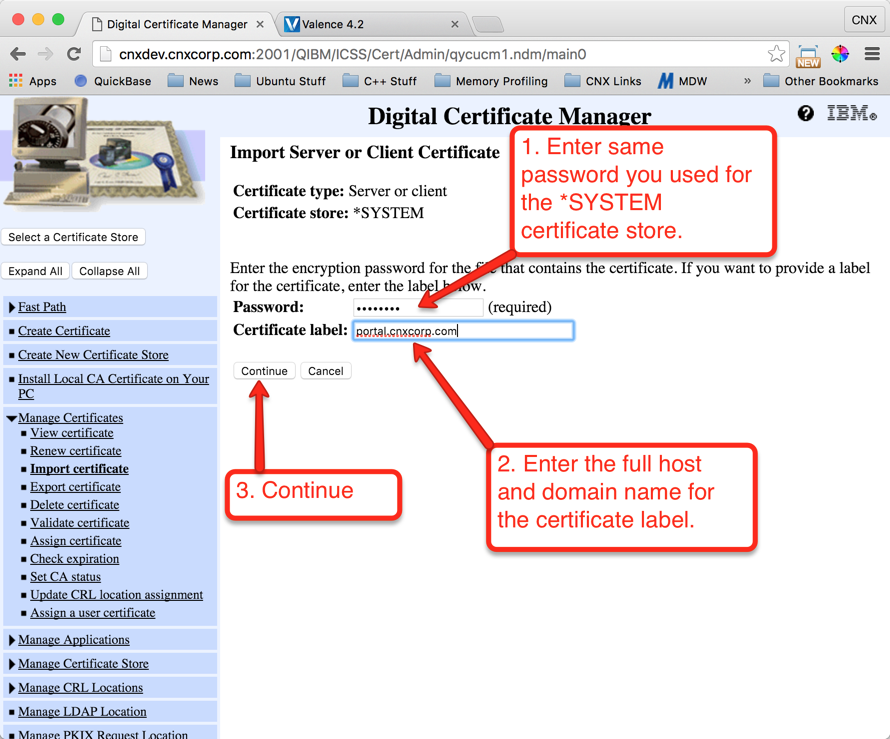
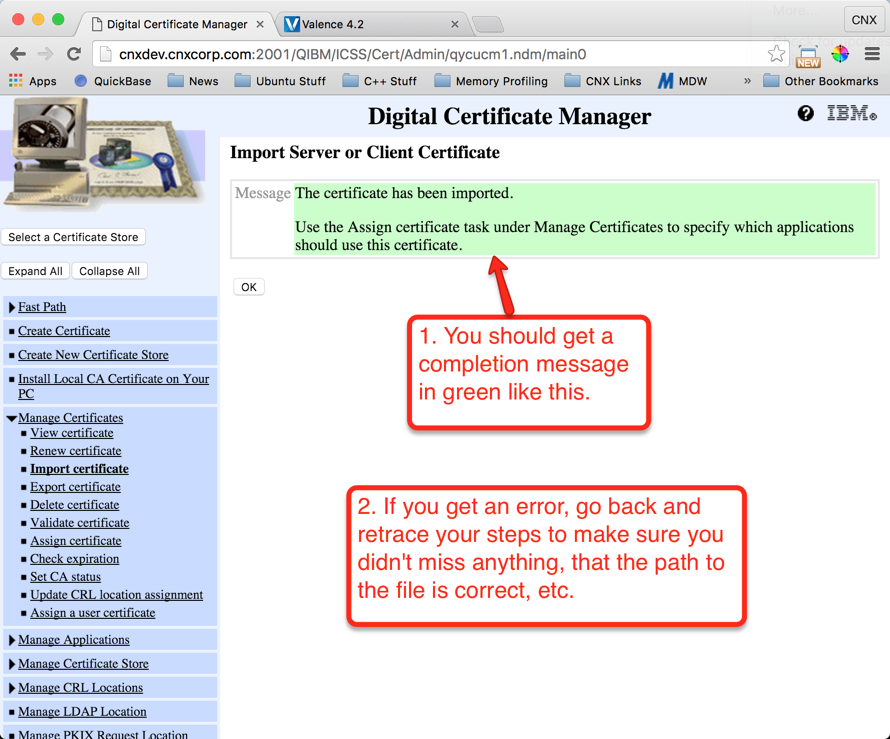
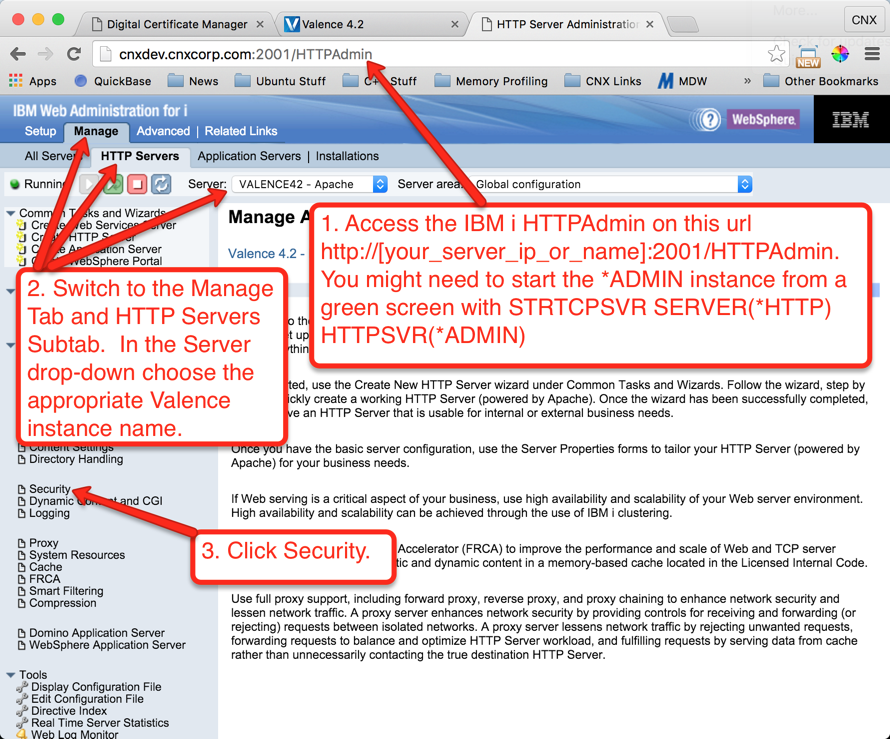
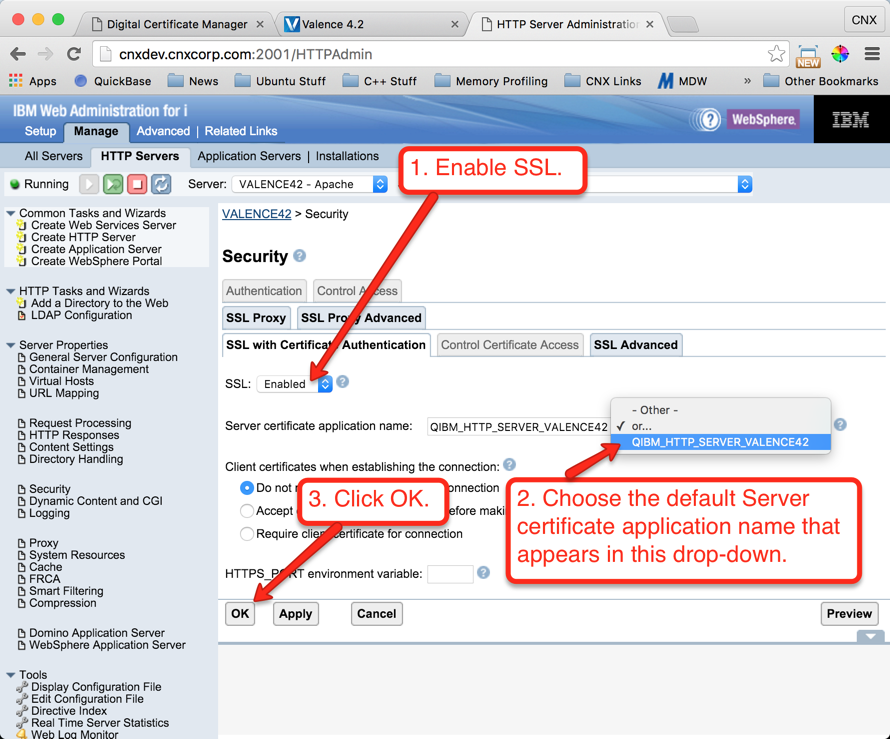
Step 7: Assign the Server Certificate to the Valence Apache Instance
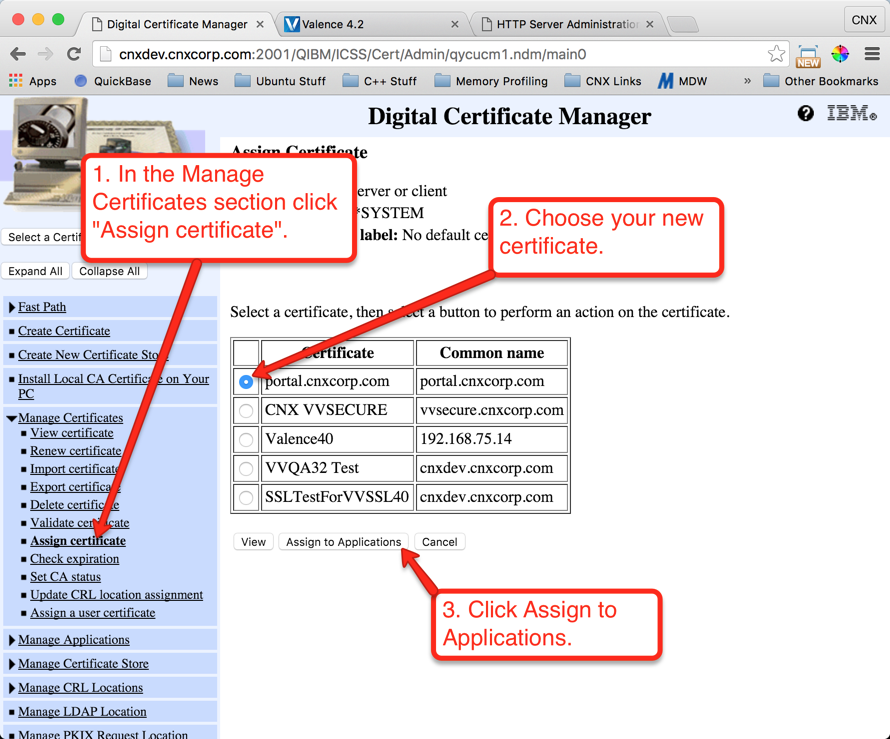
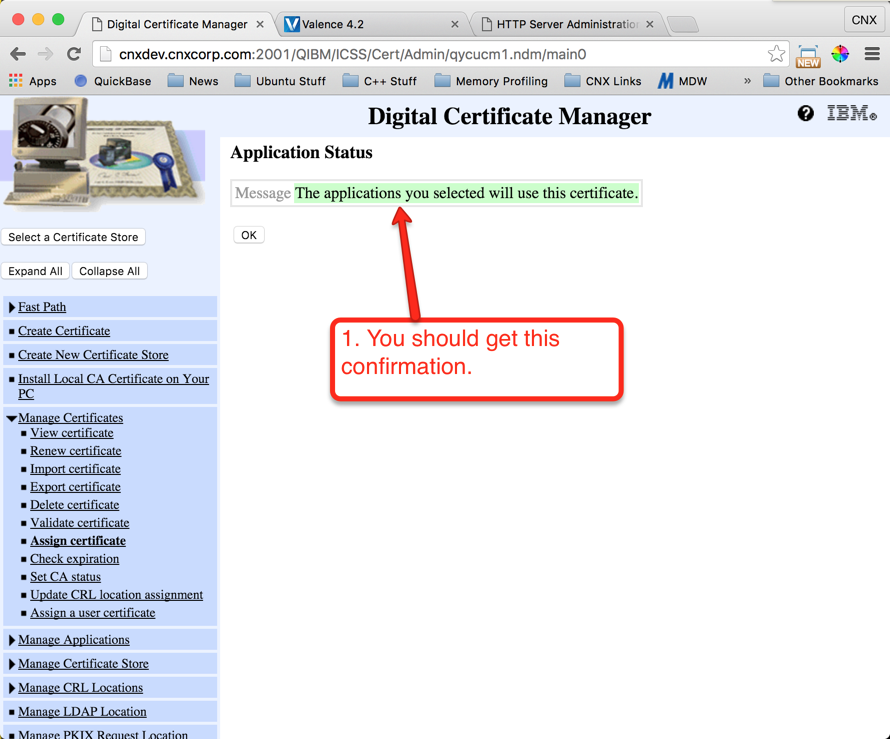
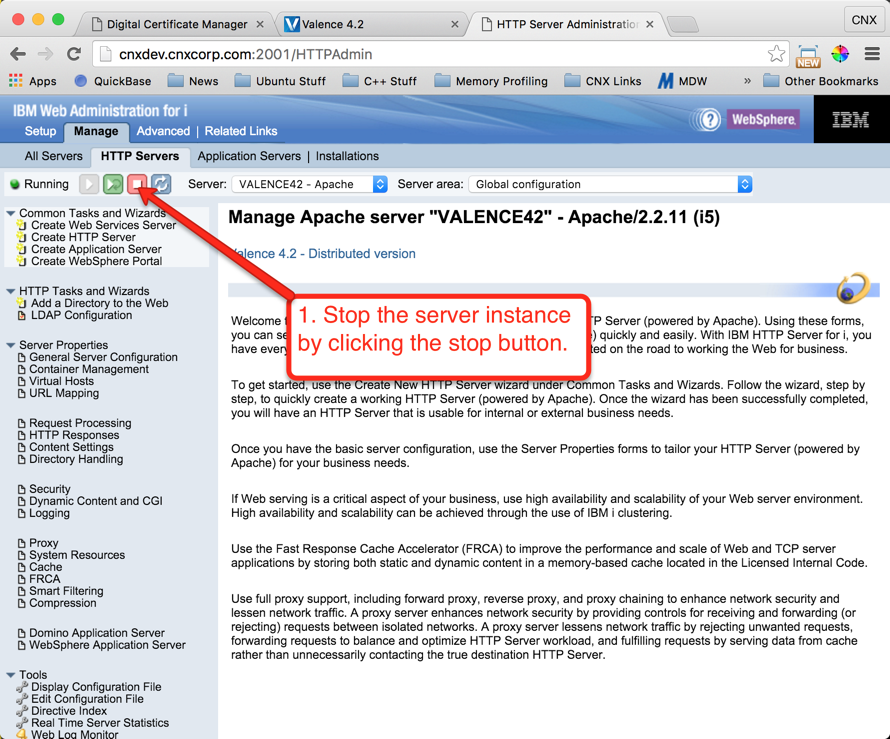
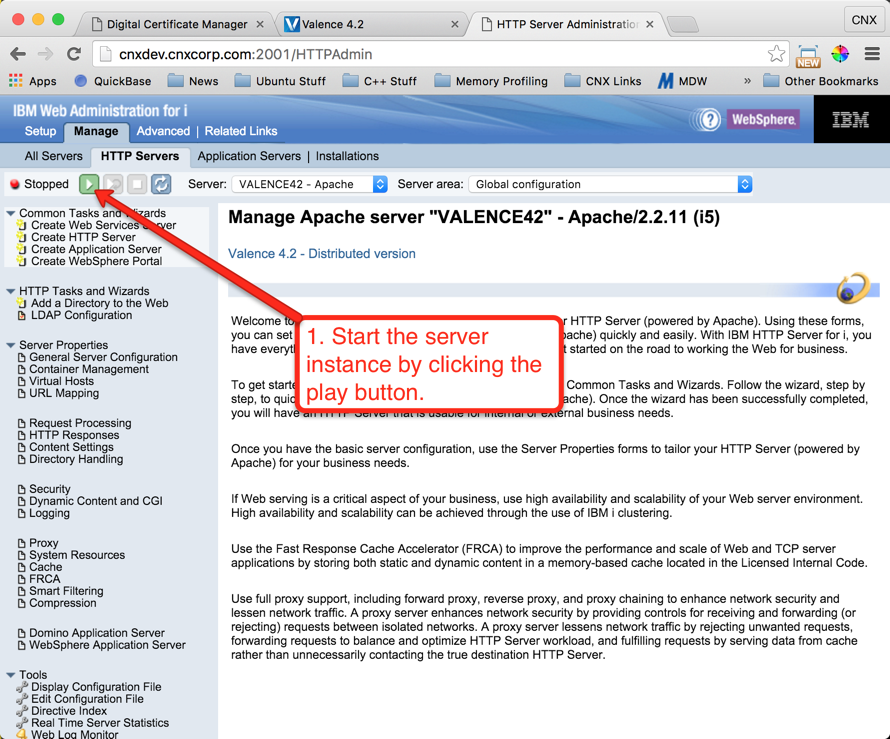
In this step we will assign the new certificate for use with the external Valence instance. Follow the instructions shown on Figures 34 through 40 to make the assignment:

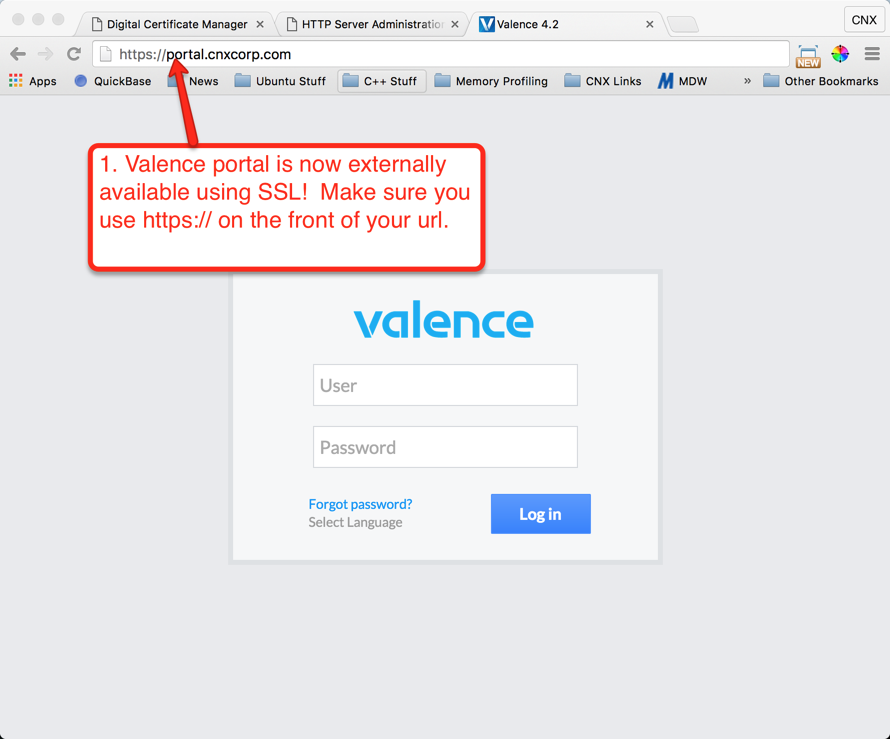
Step 8: Test Your New External Access to Valence Portal
If everything is working right, you’ll now need to use https:// at the front of your url to access Valence. In our case the url is https://portal.cnxcorp.com (this address will not work for you — it was only established to create this document and then deactivated afterwards). You can try your url by using https:// at the front followed by your host and domain that you assigned in the previous steps.
In the example we used in this document you can see the url working below in Figure 41. When you are on your internal network you should still be able to access the Valence login either with an IP address or the hostname. Again, make sure you use https:// in front of your ip address and include the internal port. If you access your Valence instance using the IP address rather than the host and domain name you’ll likely get a security warning. This is because SSL will only work securely if you’re navigating to the host and domain that is assigned in the server certificate. If your link doesn’t work, go back through the steps and make sure you didn’t miss anything.
If you’re able to access your site via the https:// address, you’re all set — you’ve securely opened up your IBM i to the outside world using SSL. You’re now ready to provide external users access to some fabulous Valence apps!