Whether you’re a seasoned SQL pro or just learning the ropes of SQL syntax on IBM i, the SQL parser built into Nitro Query App Builder is an invaluable tool you can leverage to quickly generate a web-based report for your users, or even a file maintenance application containing multiple joined files. SQL-based data sources were introduced in Valence 5.1 back in May 2017, and the feature was formally removed from Beta status this month.
Assuming you have a basic familiarity with your IBM i database, new functionality introduced in recent builds make it possible for you to prompt your way through file and field selection as you create an SQL-based data source. The SQL parser will also automatically “beautify” your SQL statements along the way, making it easy to cut-and-paste the most complicated SQL into Valence and have it magically become an easily edited piece of formatted code.
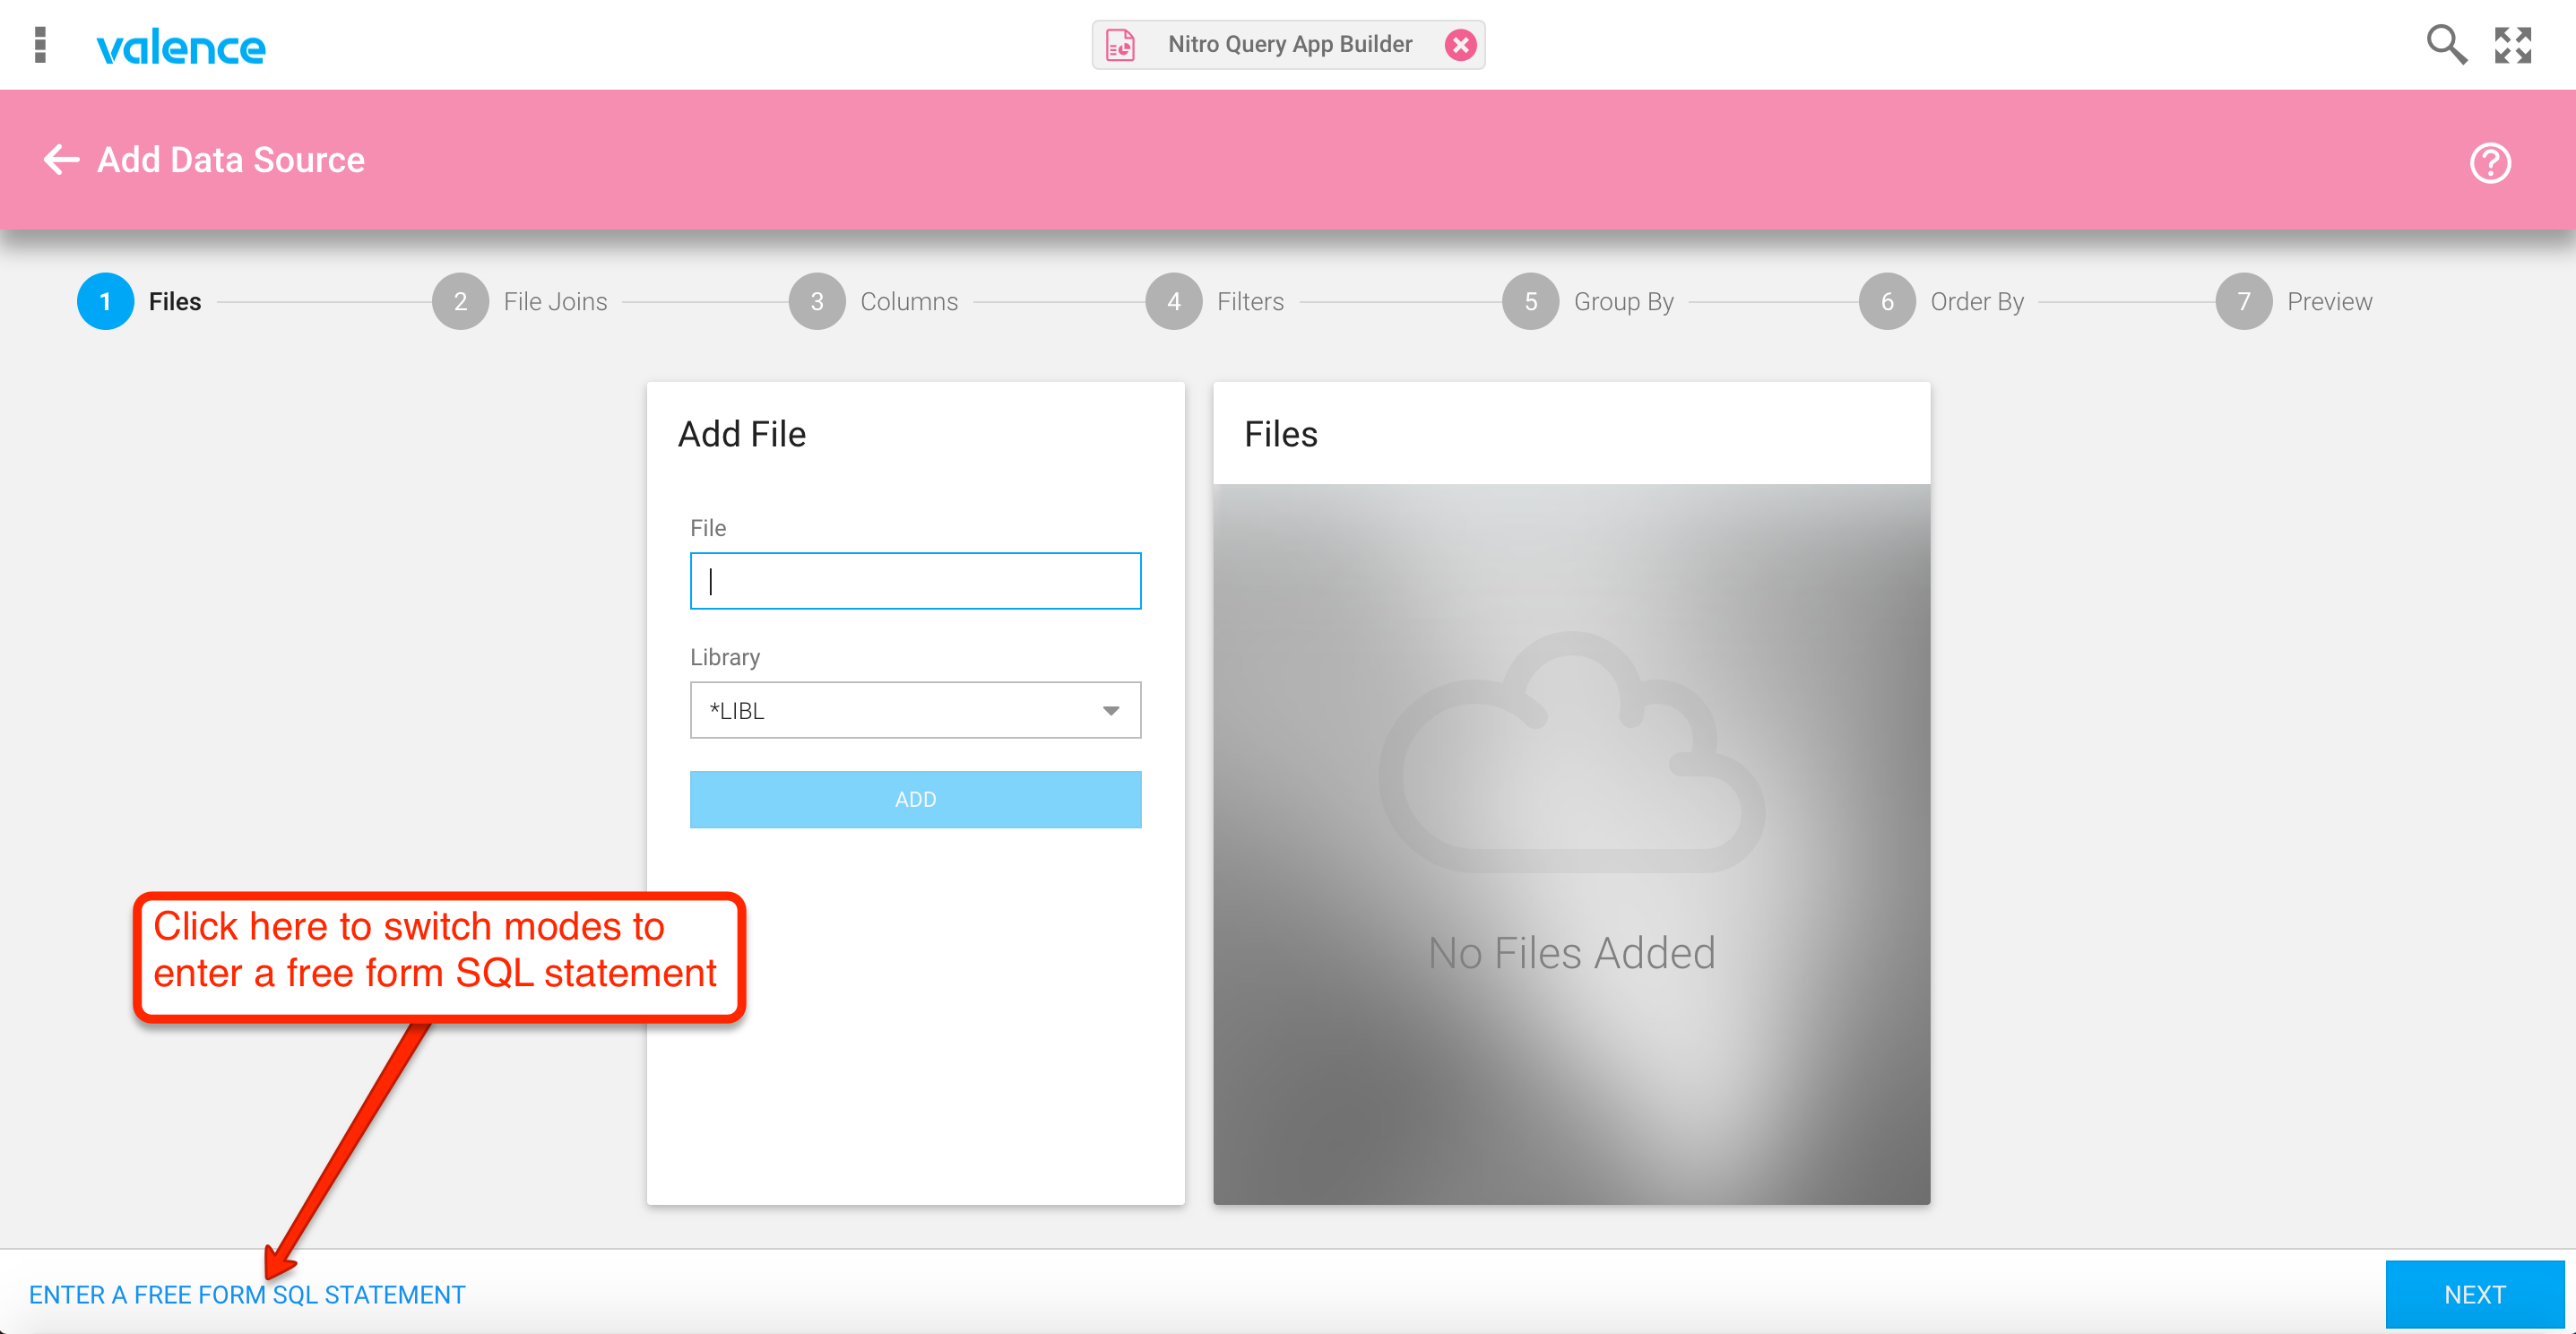
This tip shows you how to put the Nitro Query SQL parser to work. To demonstrate the parser functionality in action, let’s walk throgh the process of assembling an SQL-based datasource that joins the Valence sample customer master file DEMOCMAST with the sample customer order file DEMOORDER. The first step is to launch the Nitro Query App Builder app and click the pink Plus icon in the lower right to create a new data source. To switch to SQL mode, click the “Enter a free form SQL Statement” link on the lower left, as depicted below in figure 1.
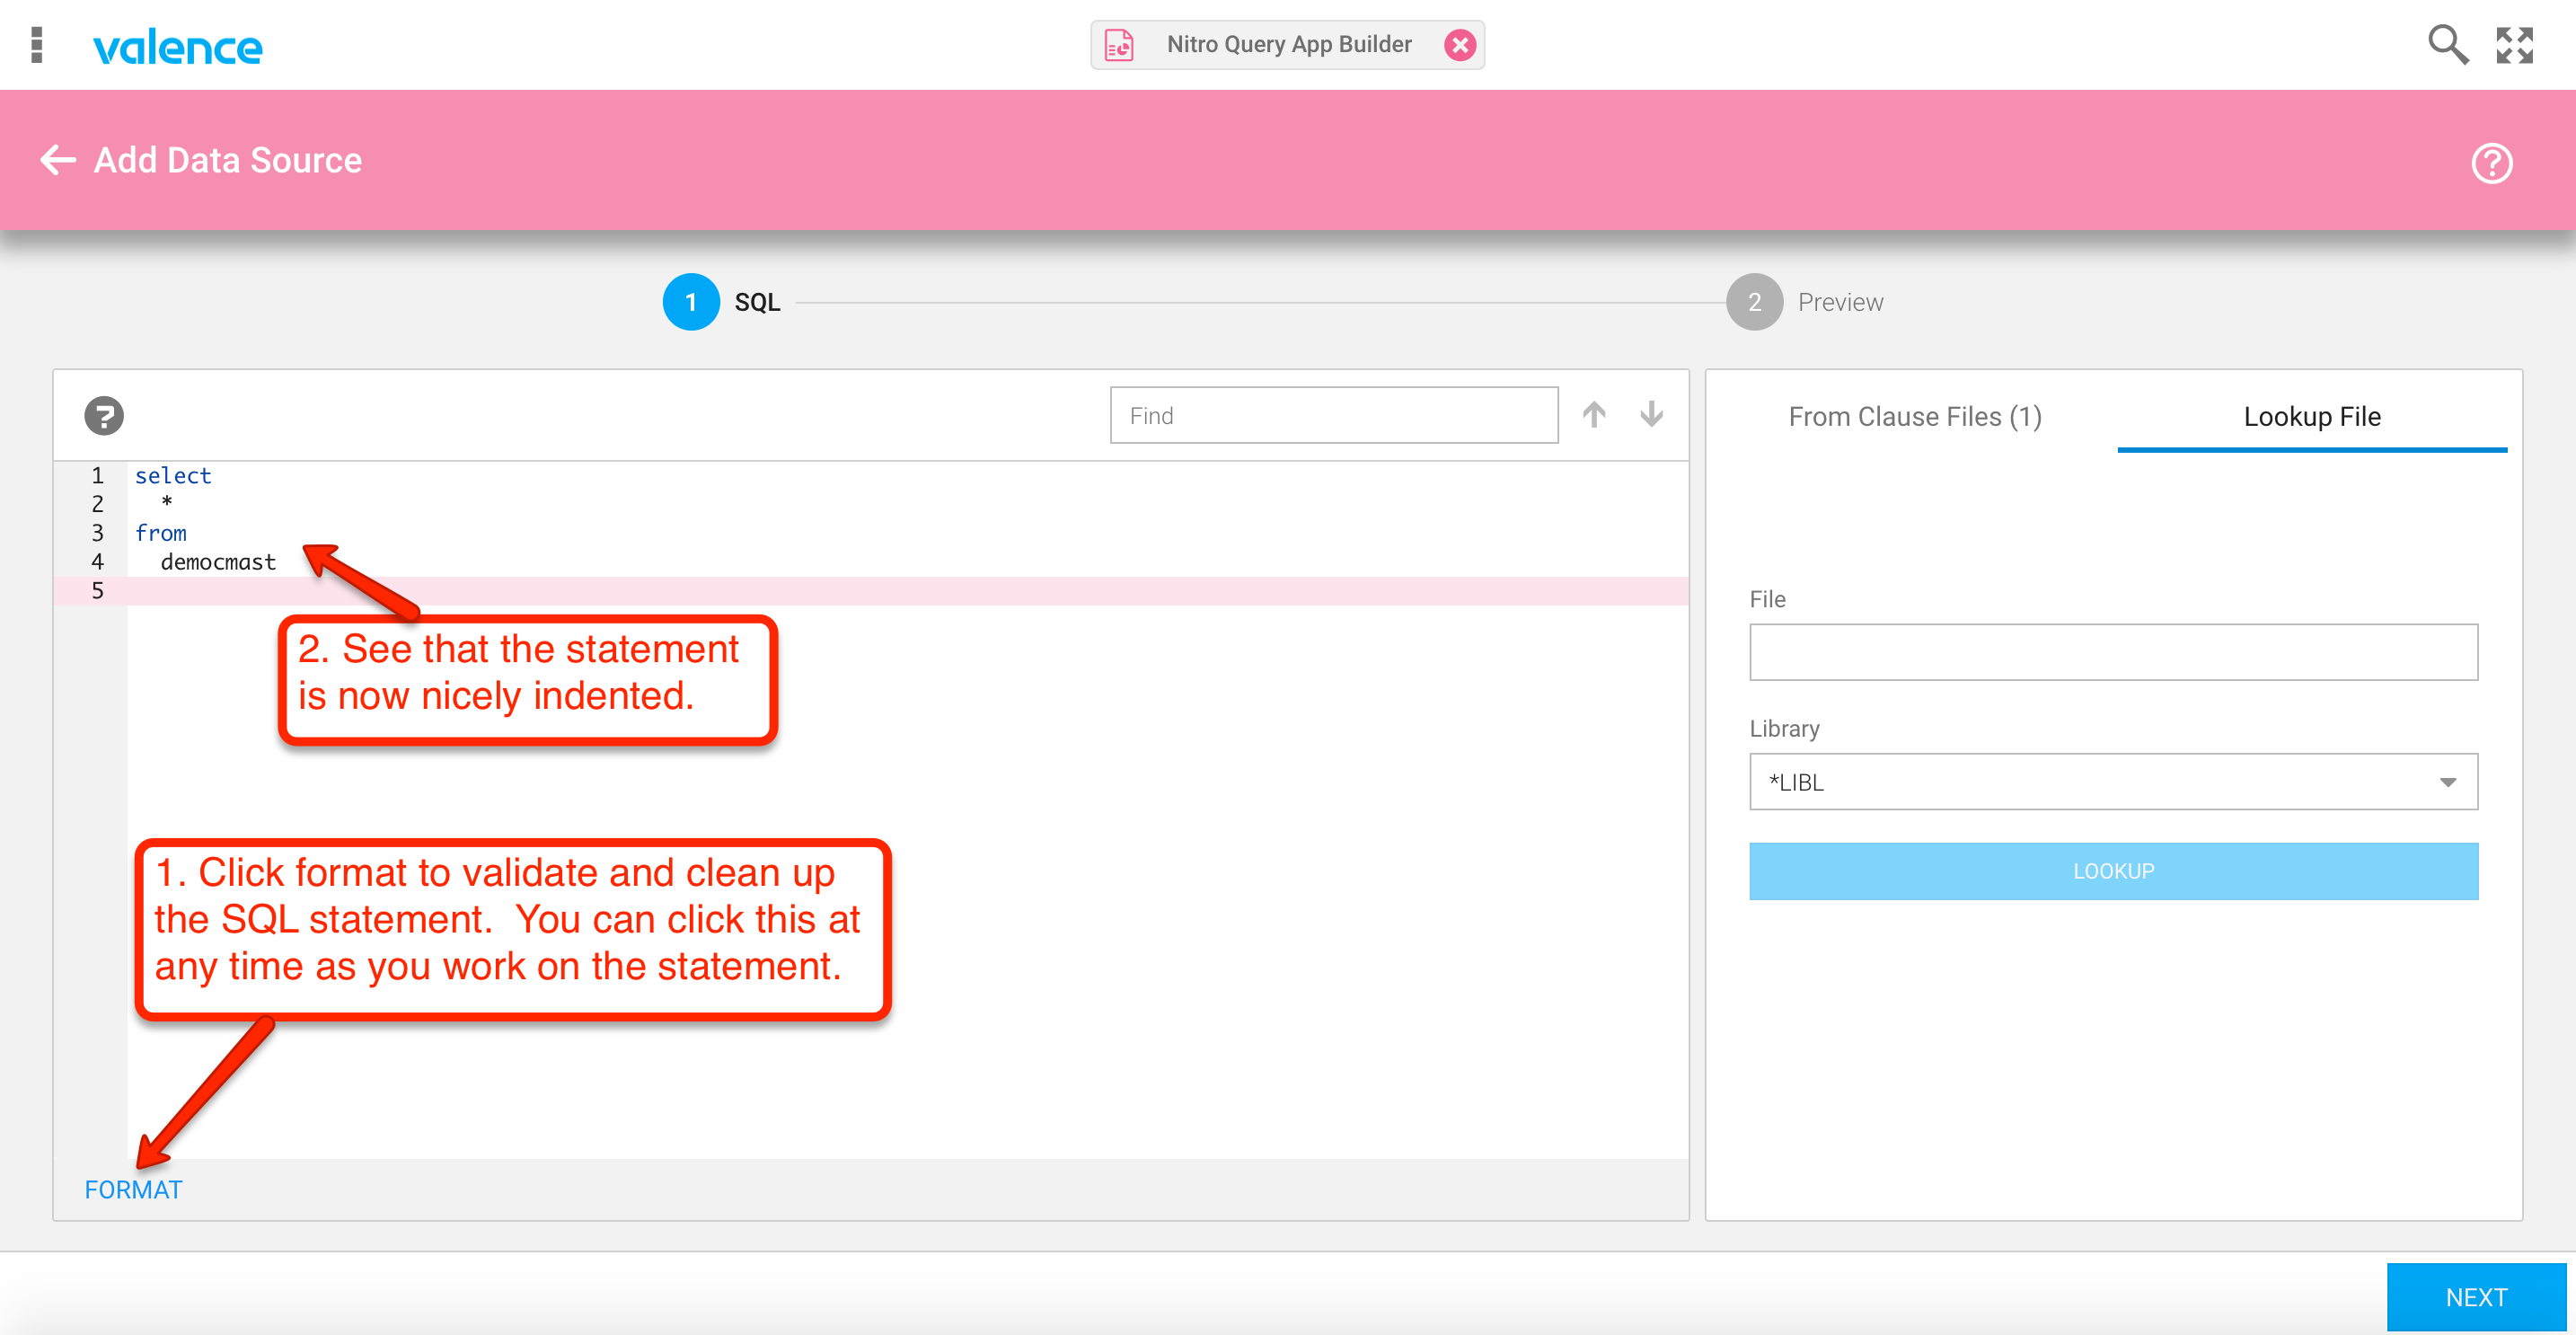
Now we can enter the initial part of our SQL select statement. For starters, we’ll just enter a basic “select all” statement for the customer master file and let the parser format it. Do this by keying in “select * from democmast” and then hit the “FORMAT” button in the lower left, as demonstrated in figures 2 and 3…

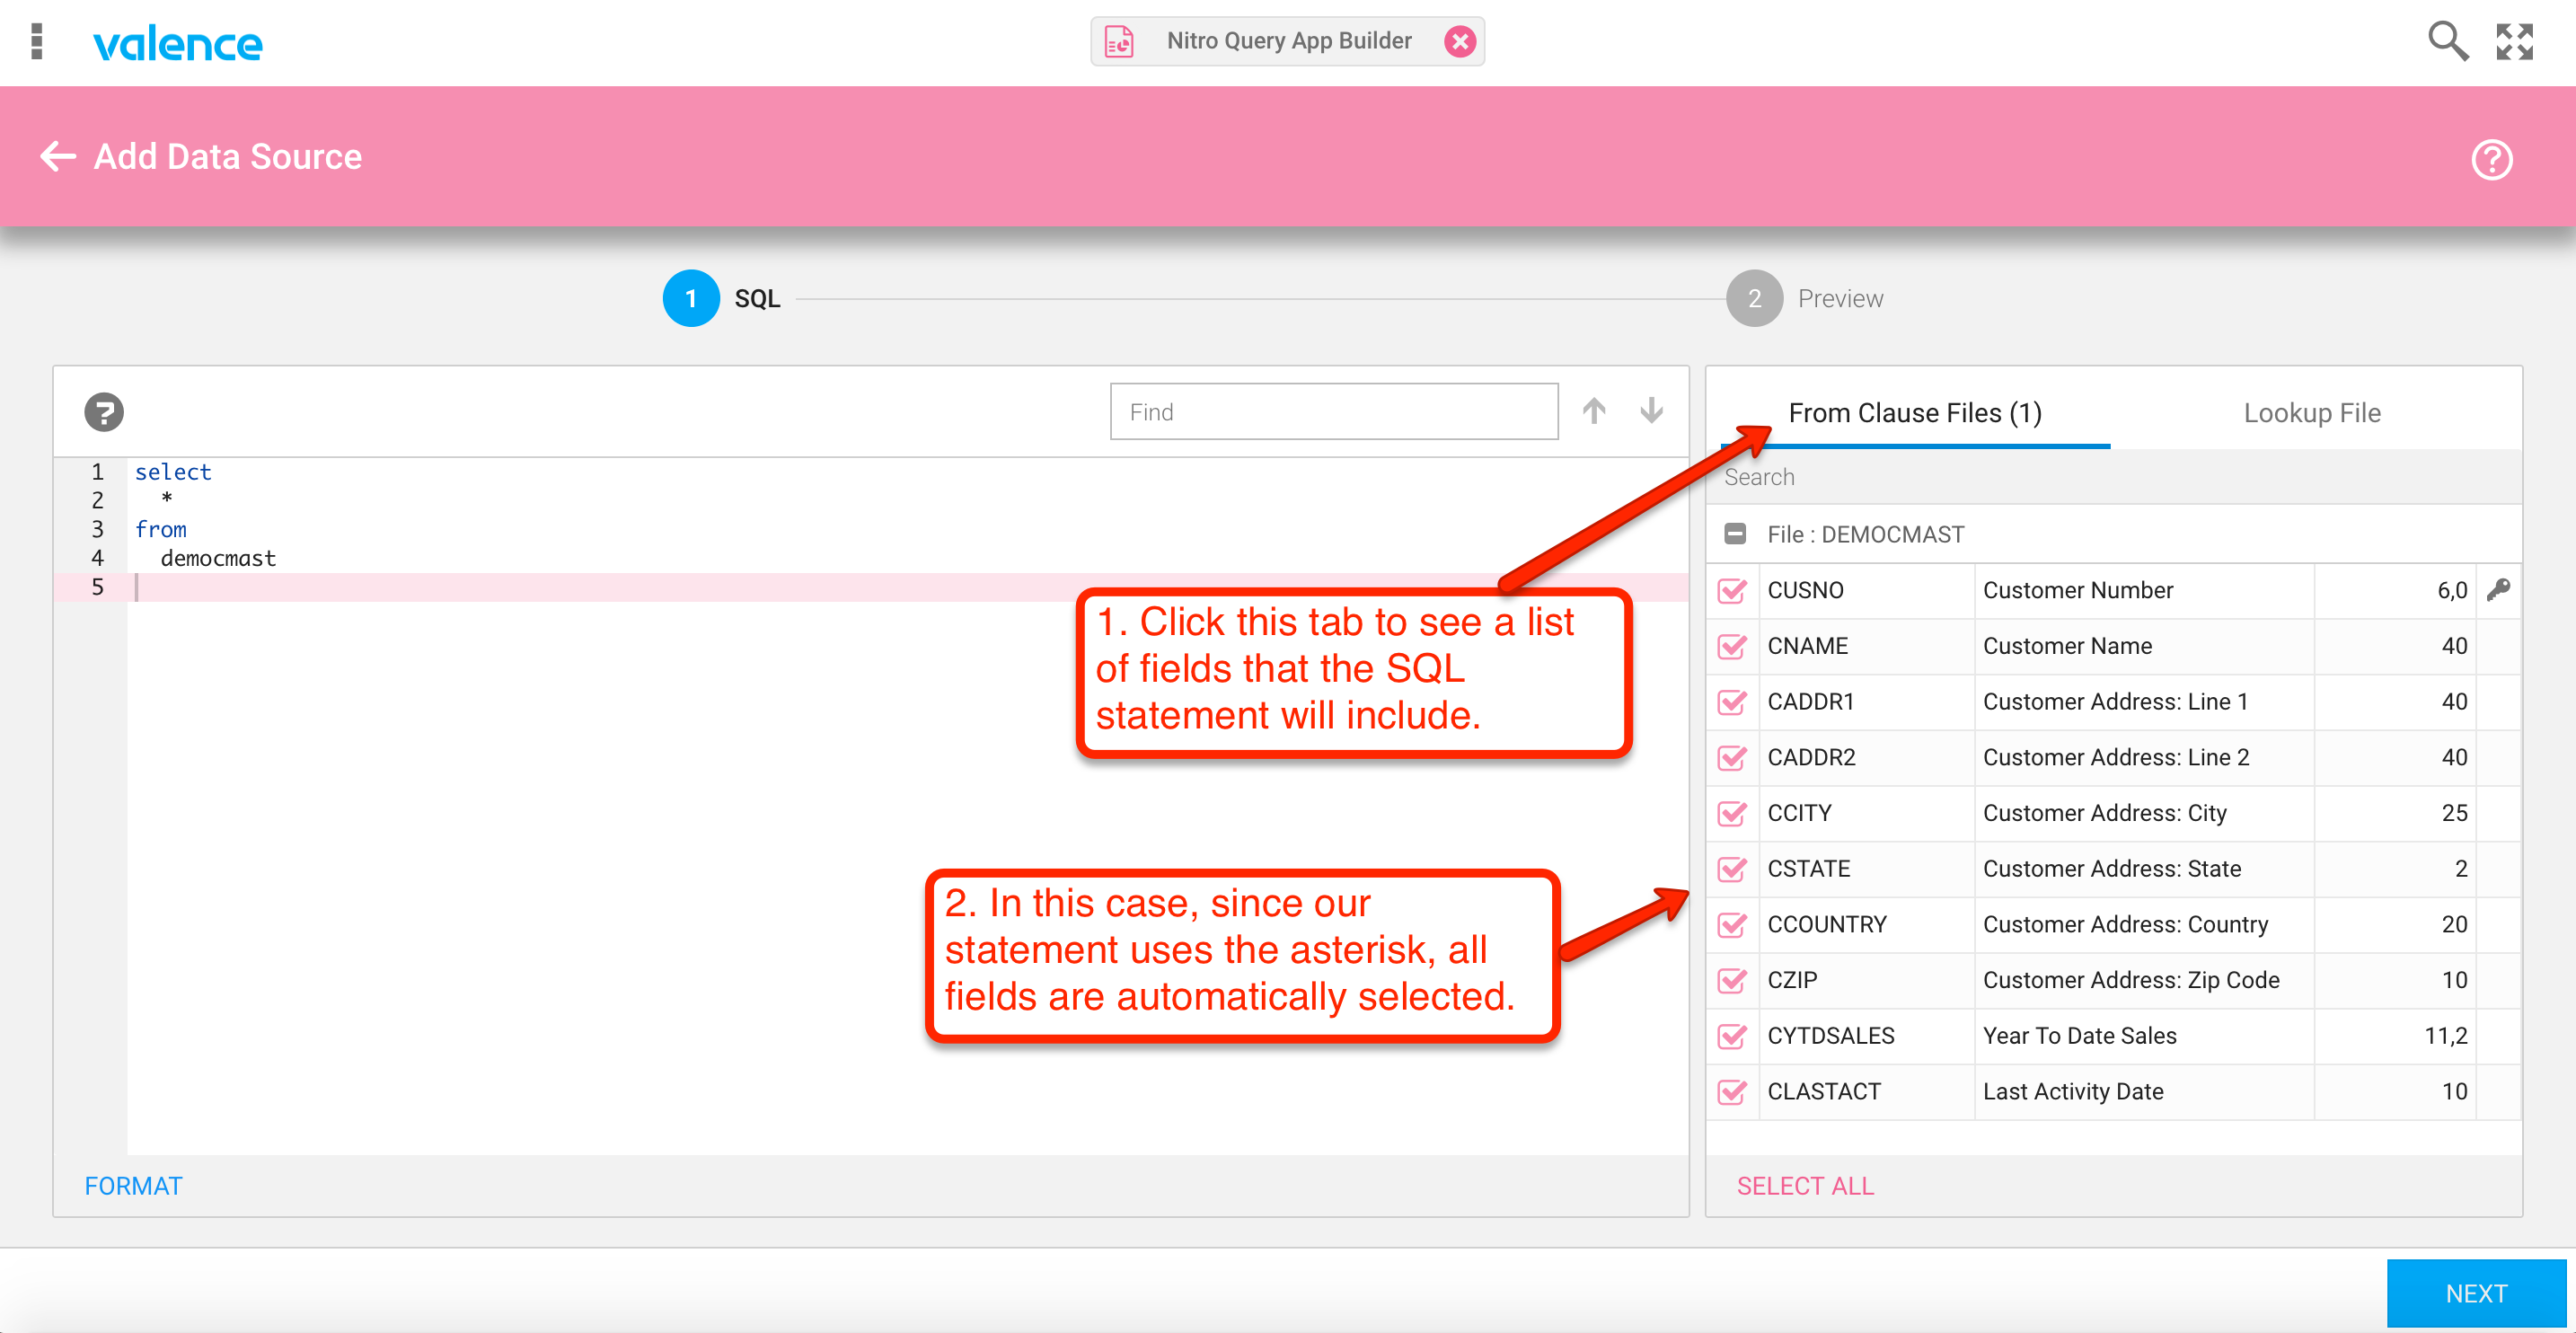
Notice that the SQL parser has detected the file name and is showing it as one of the “From Clause Files” in the right panel. Click on the tab to see the available fields in the file, all of which are selected at this point since we specified a generic “select *” in our statement.
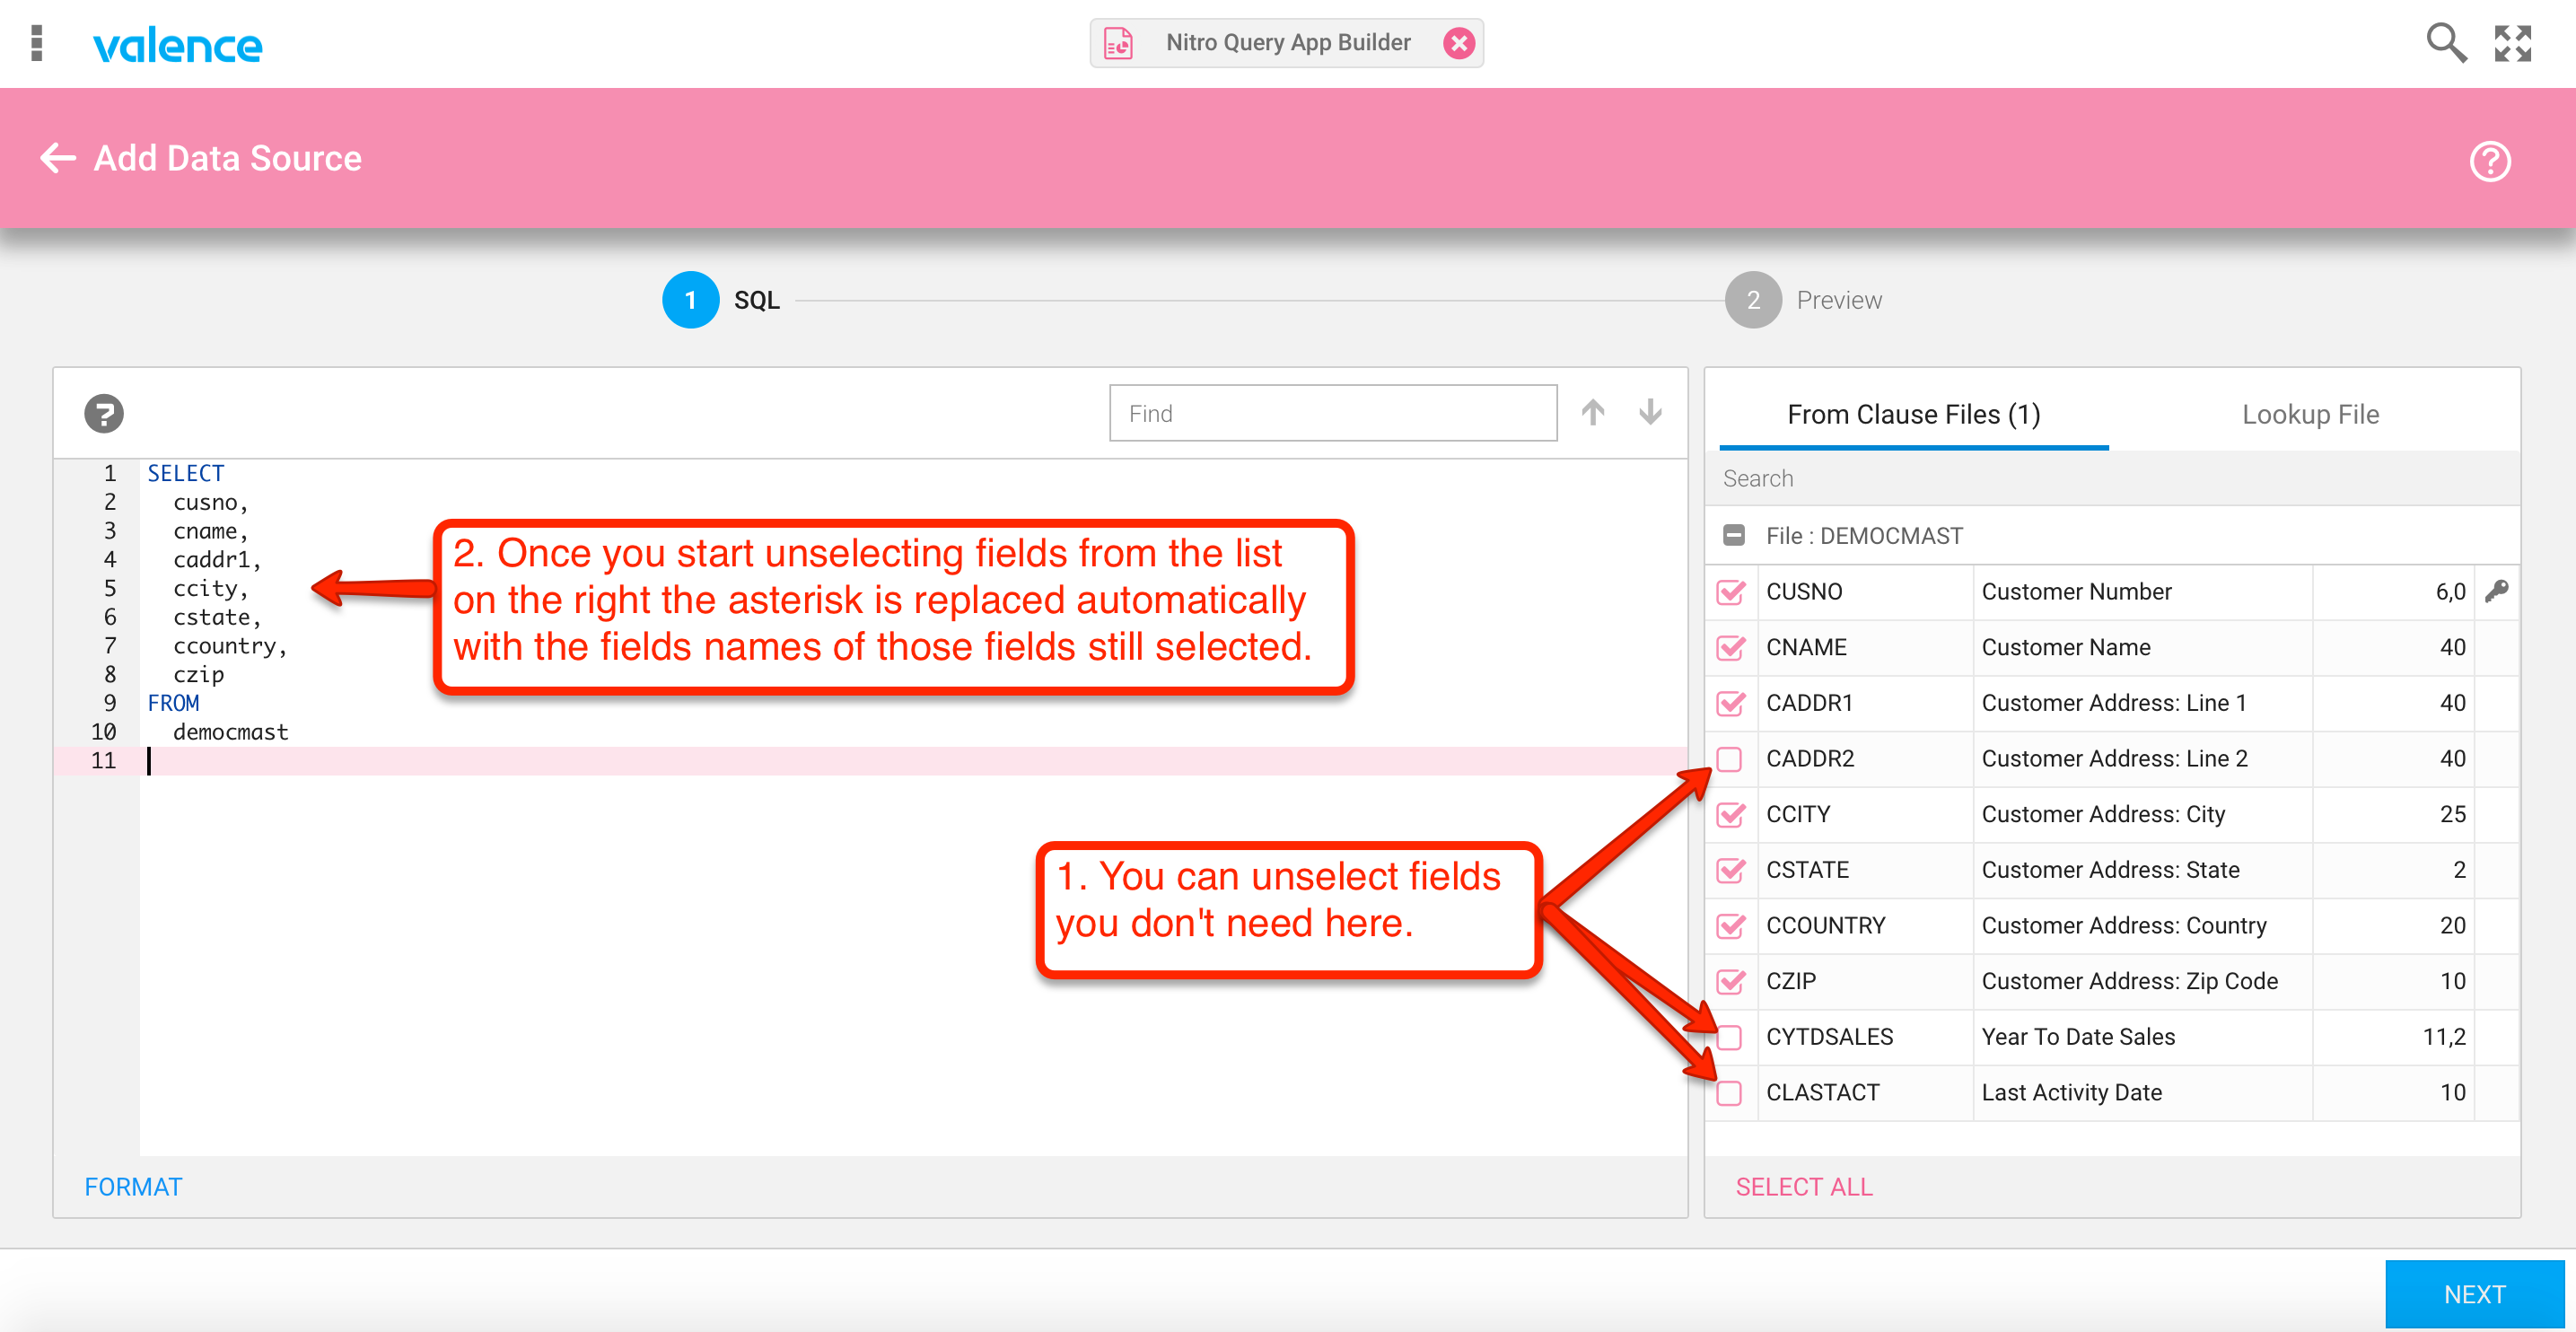
At this point we can clean up our data source by de-selecting the fields or columns we don’t need for the app we’re creating. As soon as you begin unchecking any of the columns, you’ll notice the SQL select statement is automatically adjusted accordingly, as shown in figure 5:
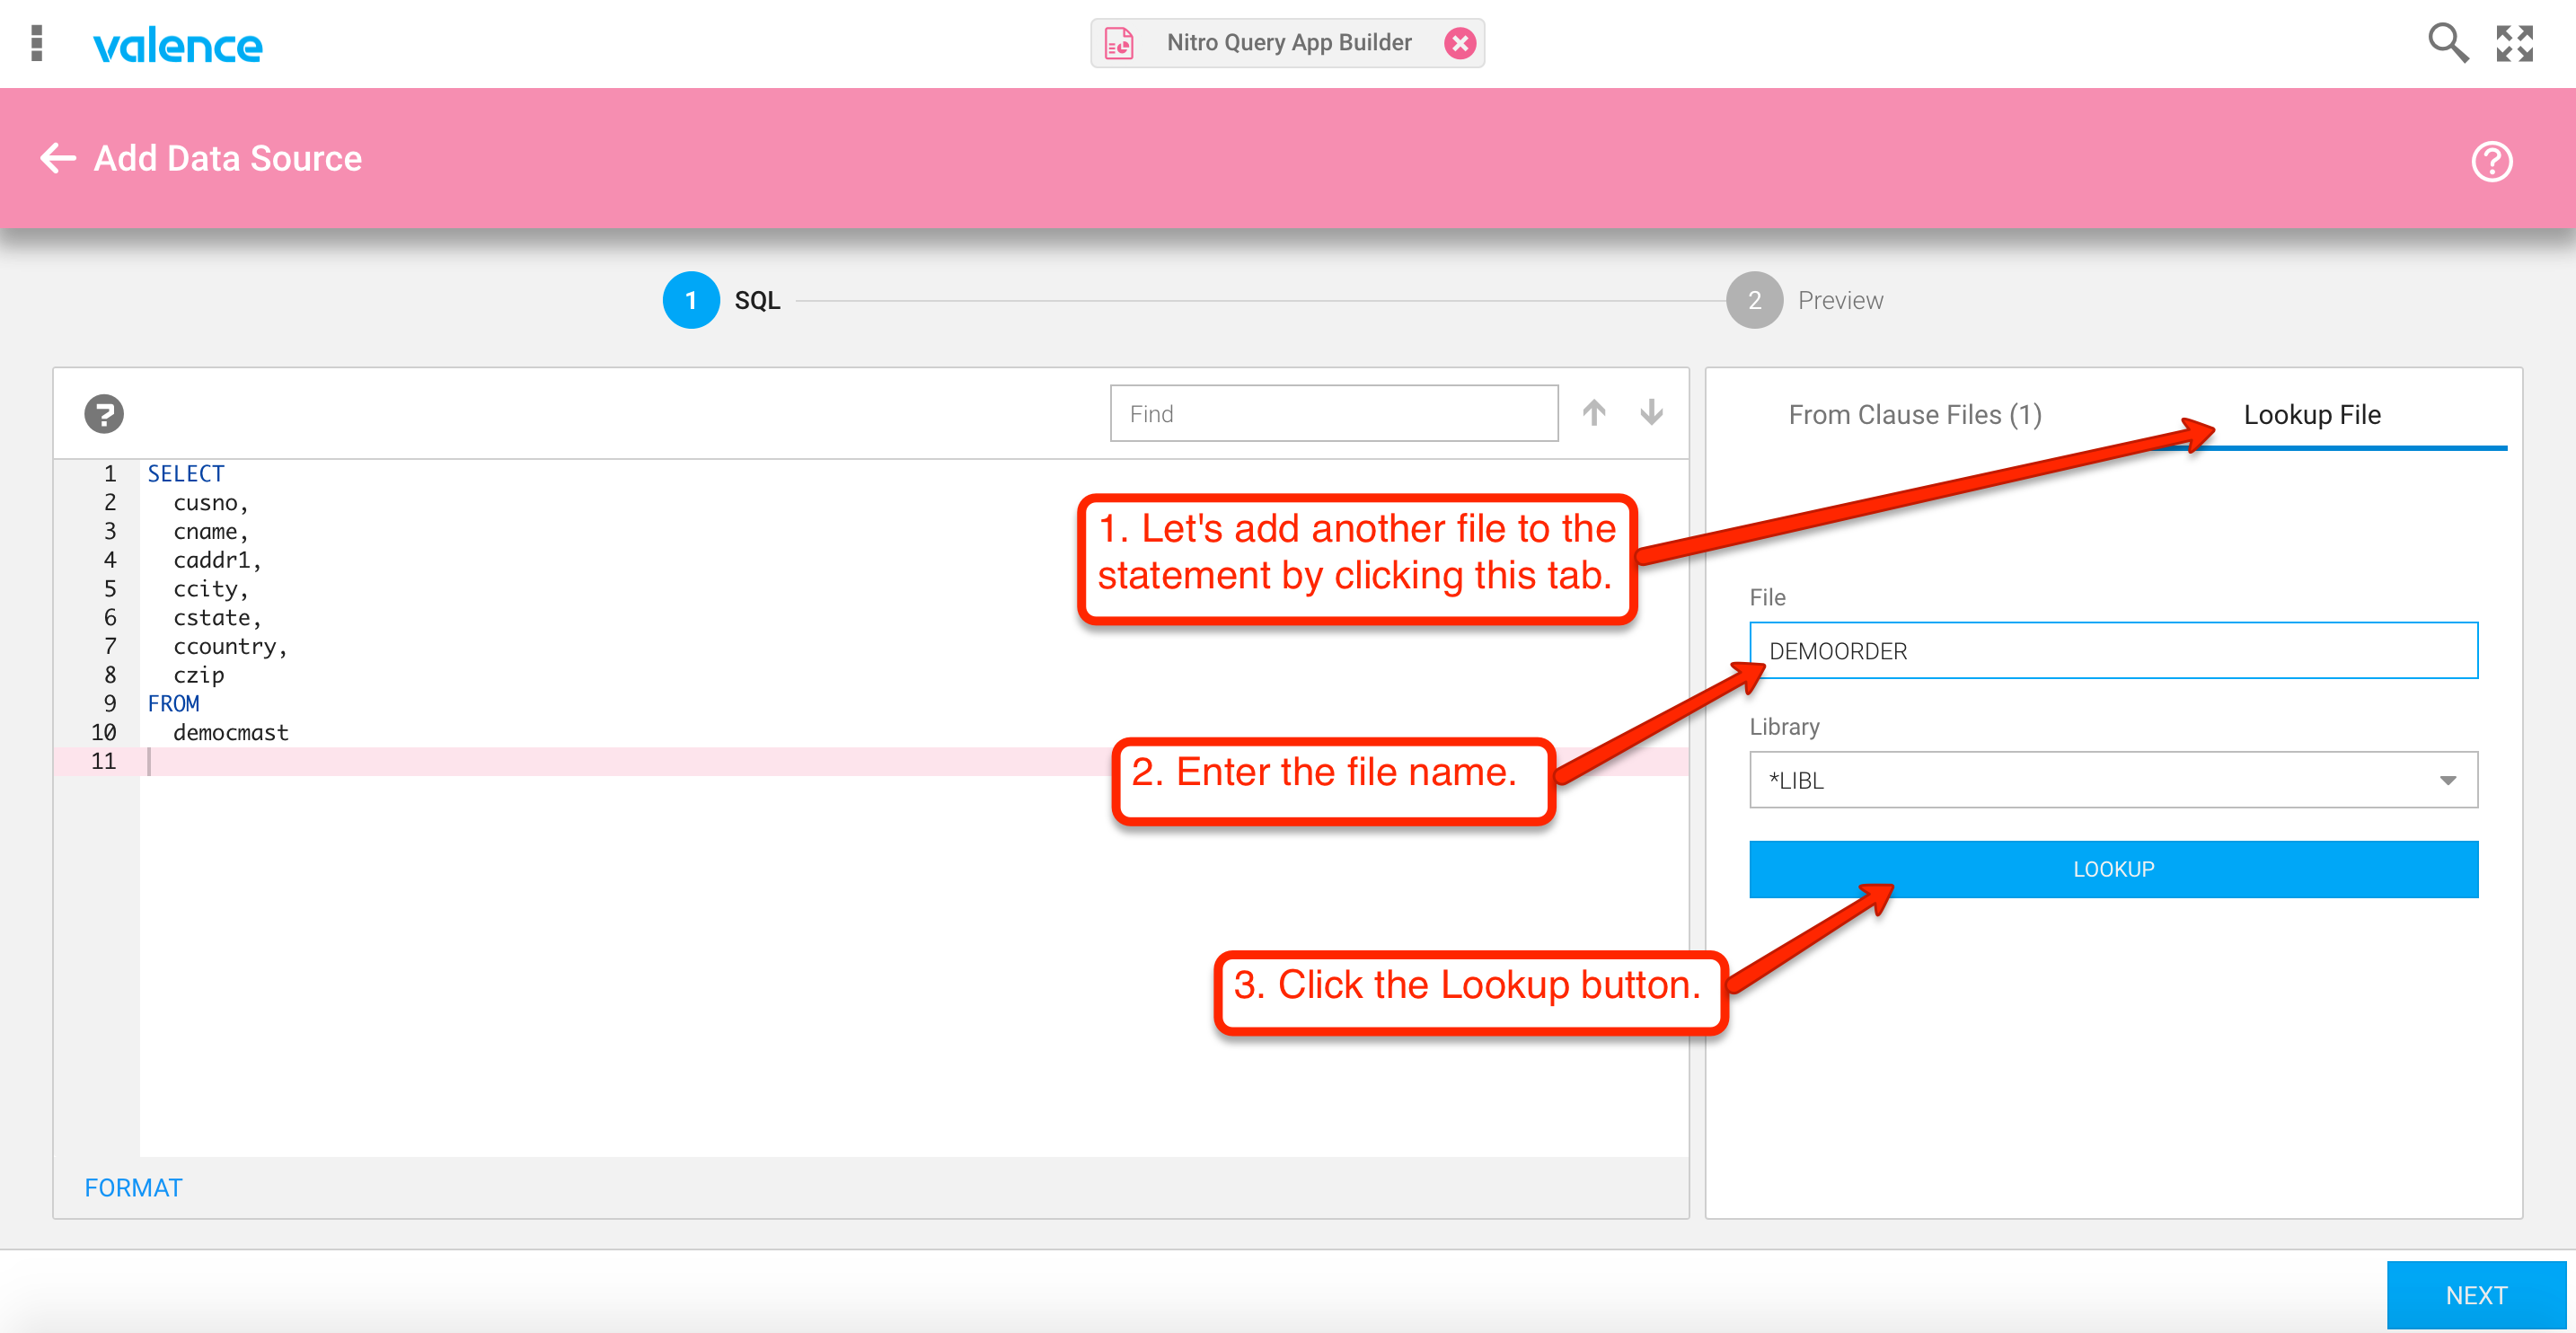
Now that we’ve got all the columns we need from the customer master, let’s move on to the customer order file. You could of course start adding to the SQL statement manually at this point, but for sake of example we’ll use the lookup function to automatically do the initial legwork. Click on the “Lookup File” tab on the right and enter the file name as shown in figure 6:
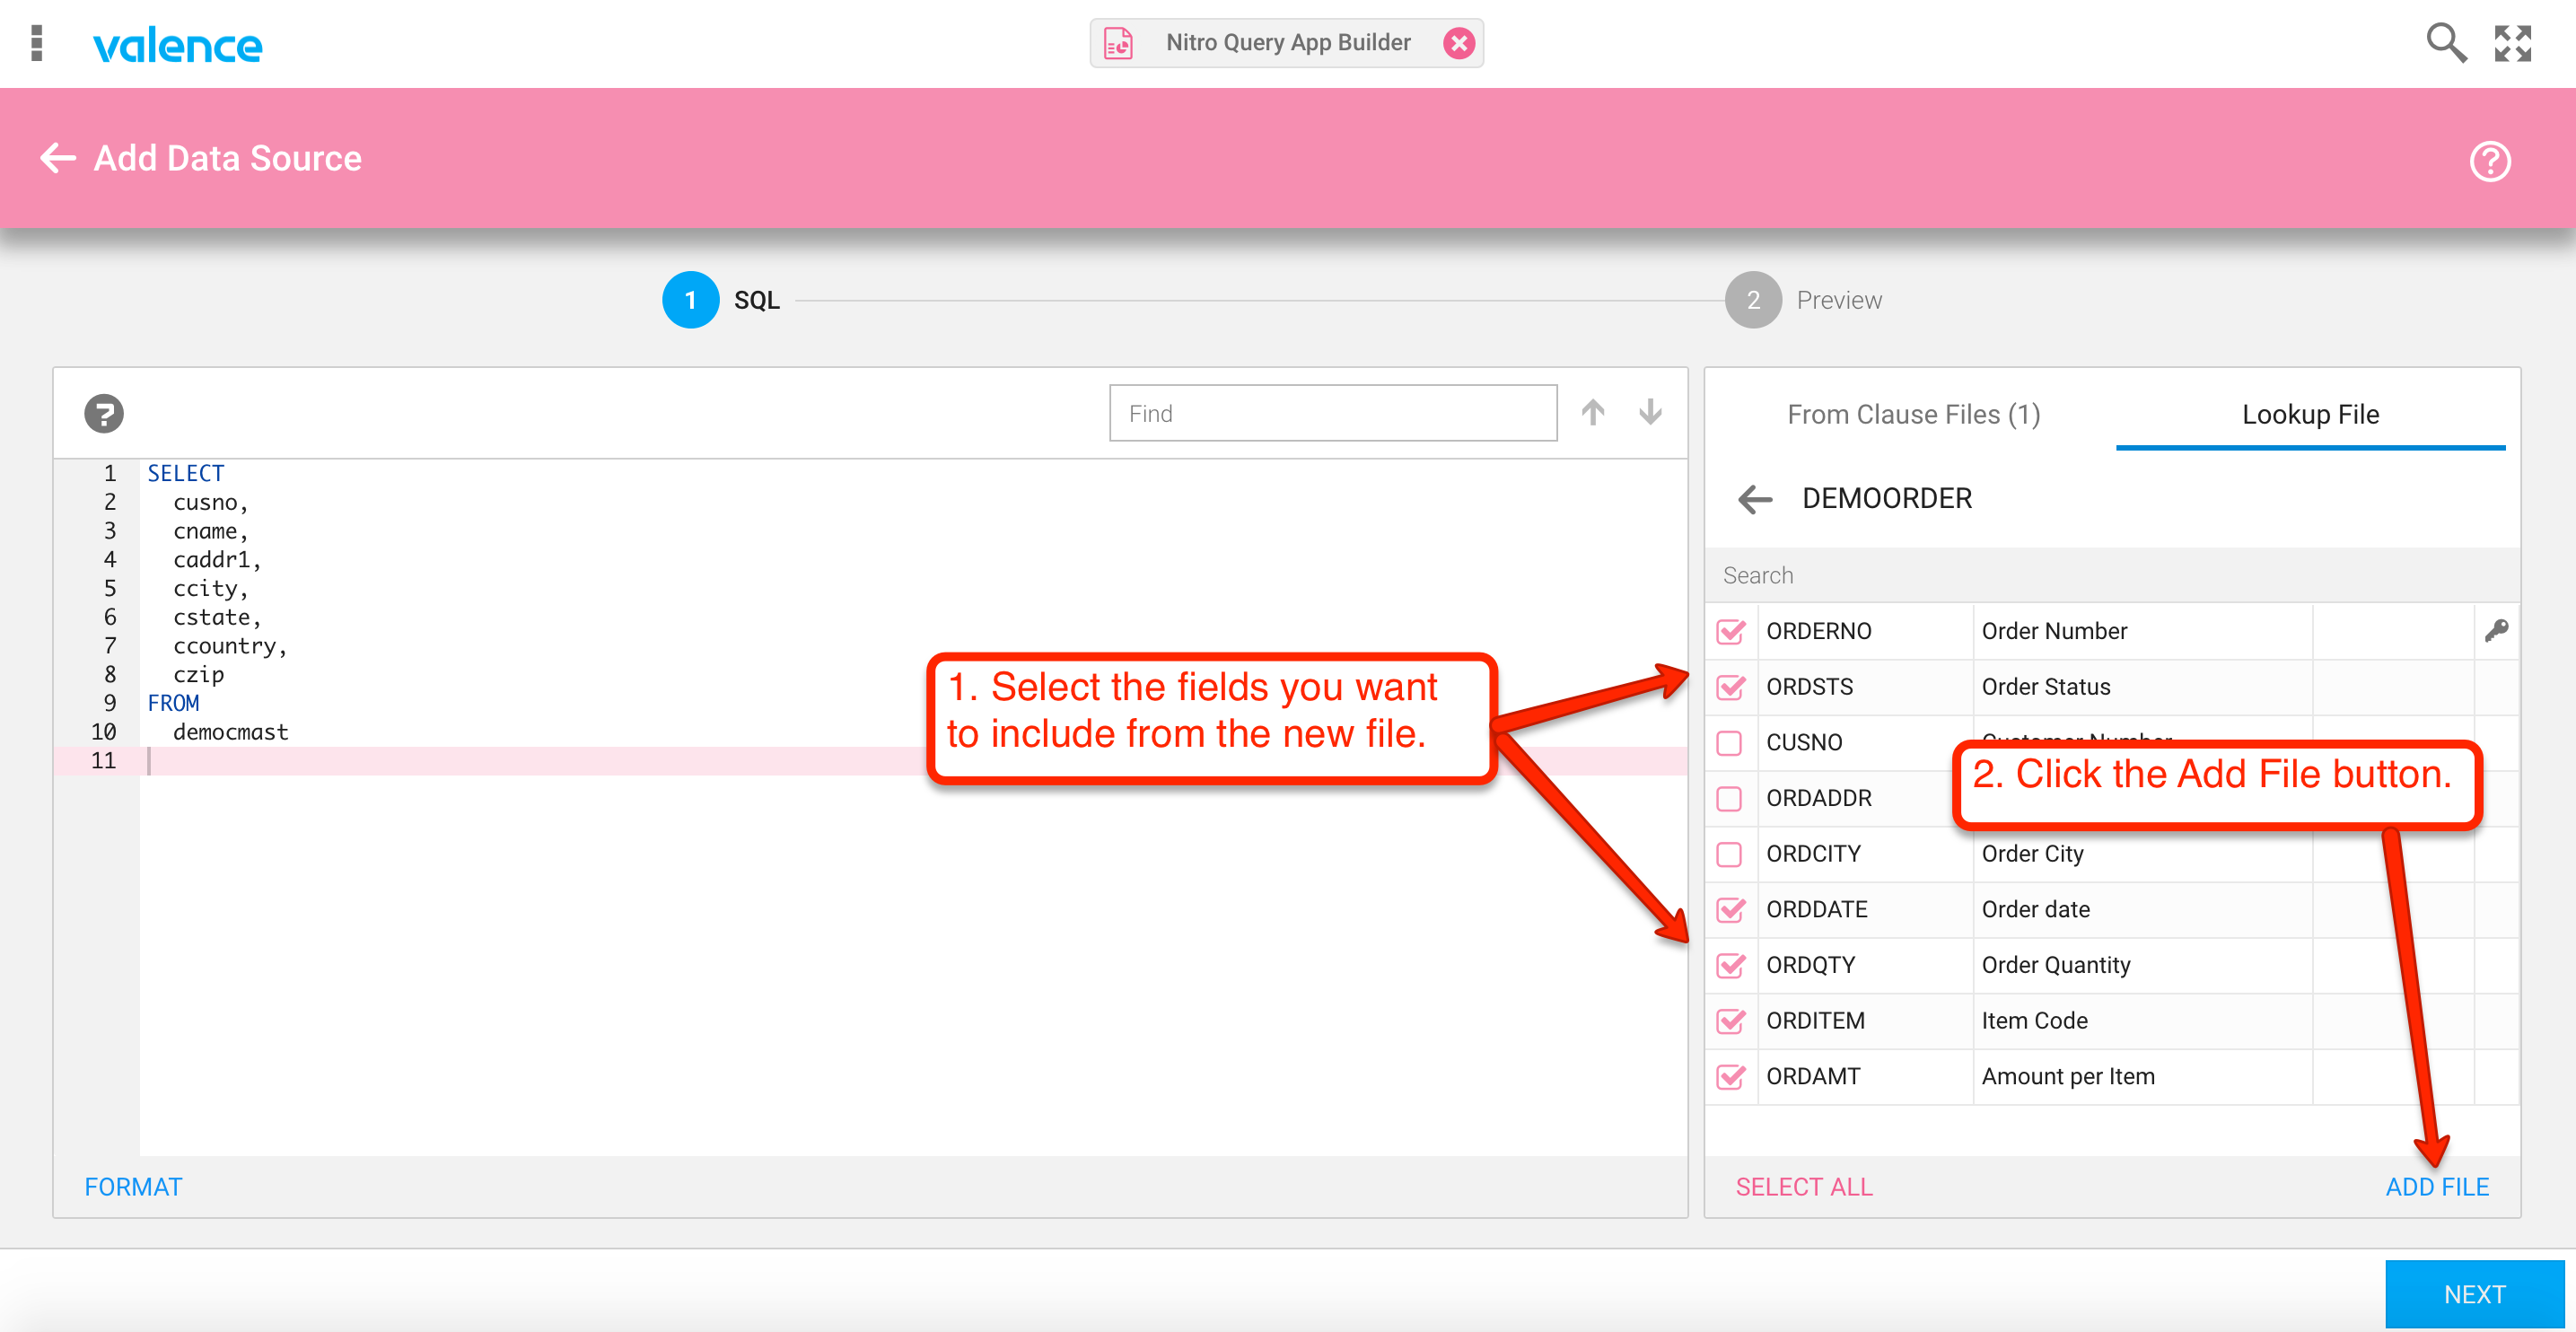
With the file’s fields listed, we can now select the columns we’d like added to our statement and have them added in automatically, along with the initial part of the join syntax…
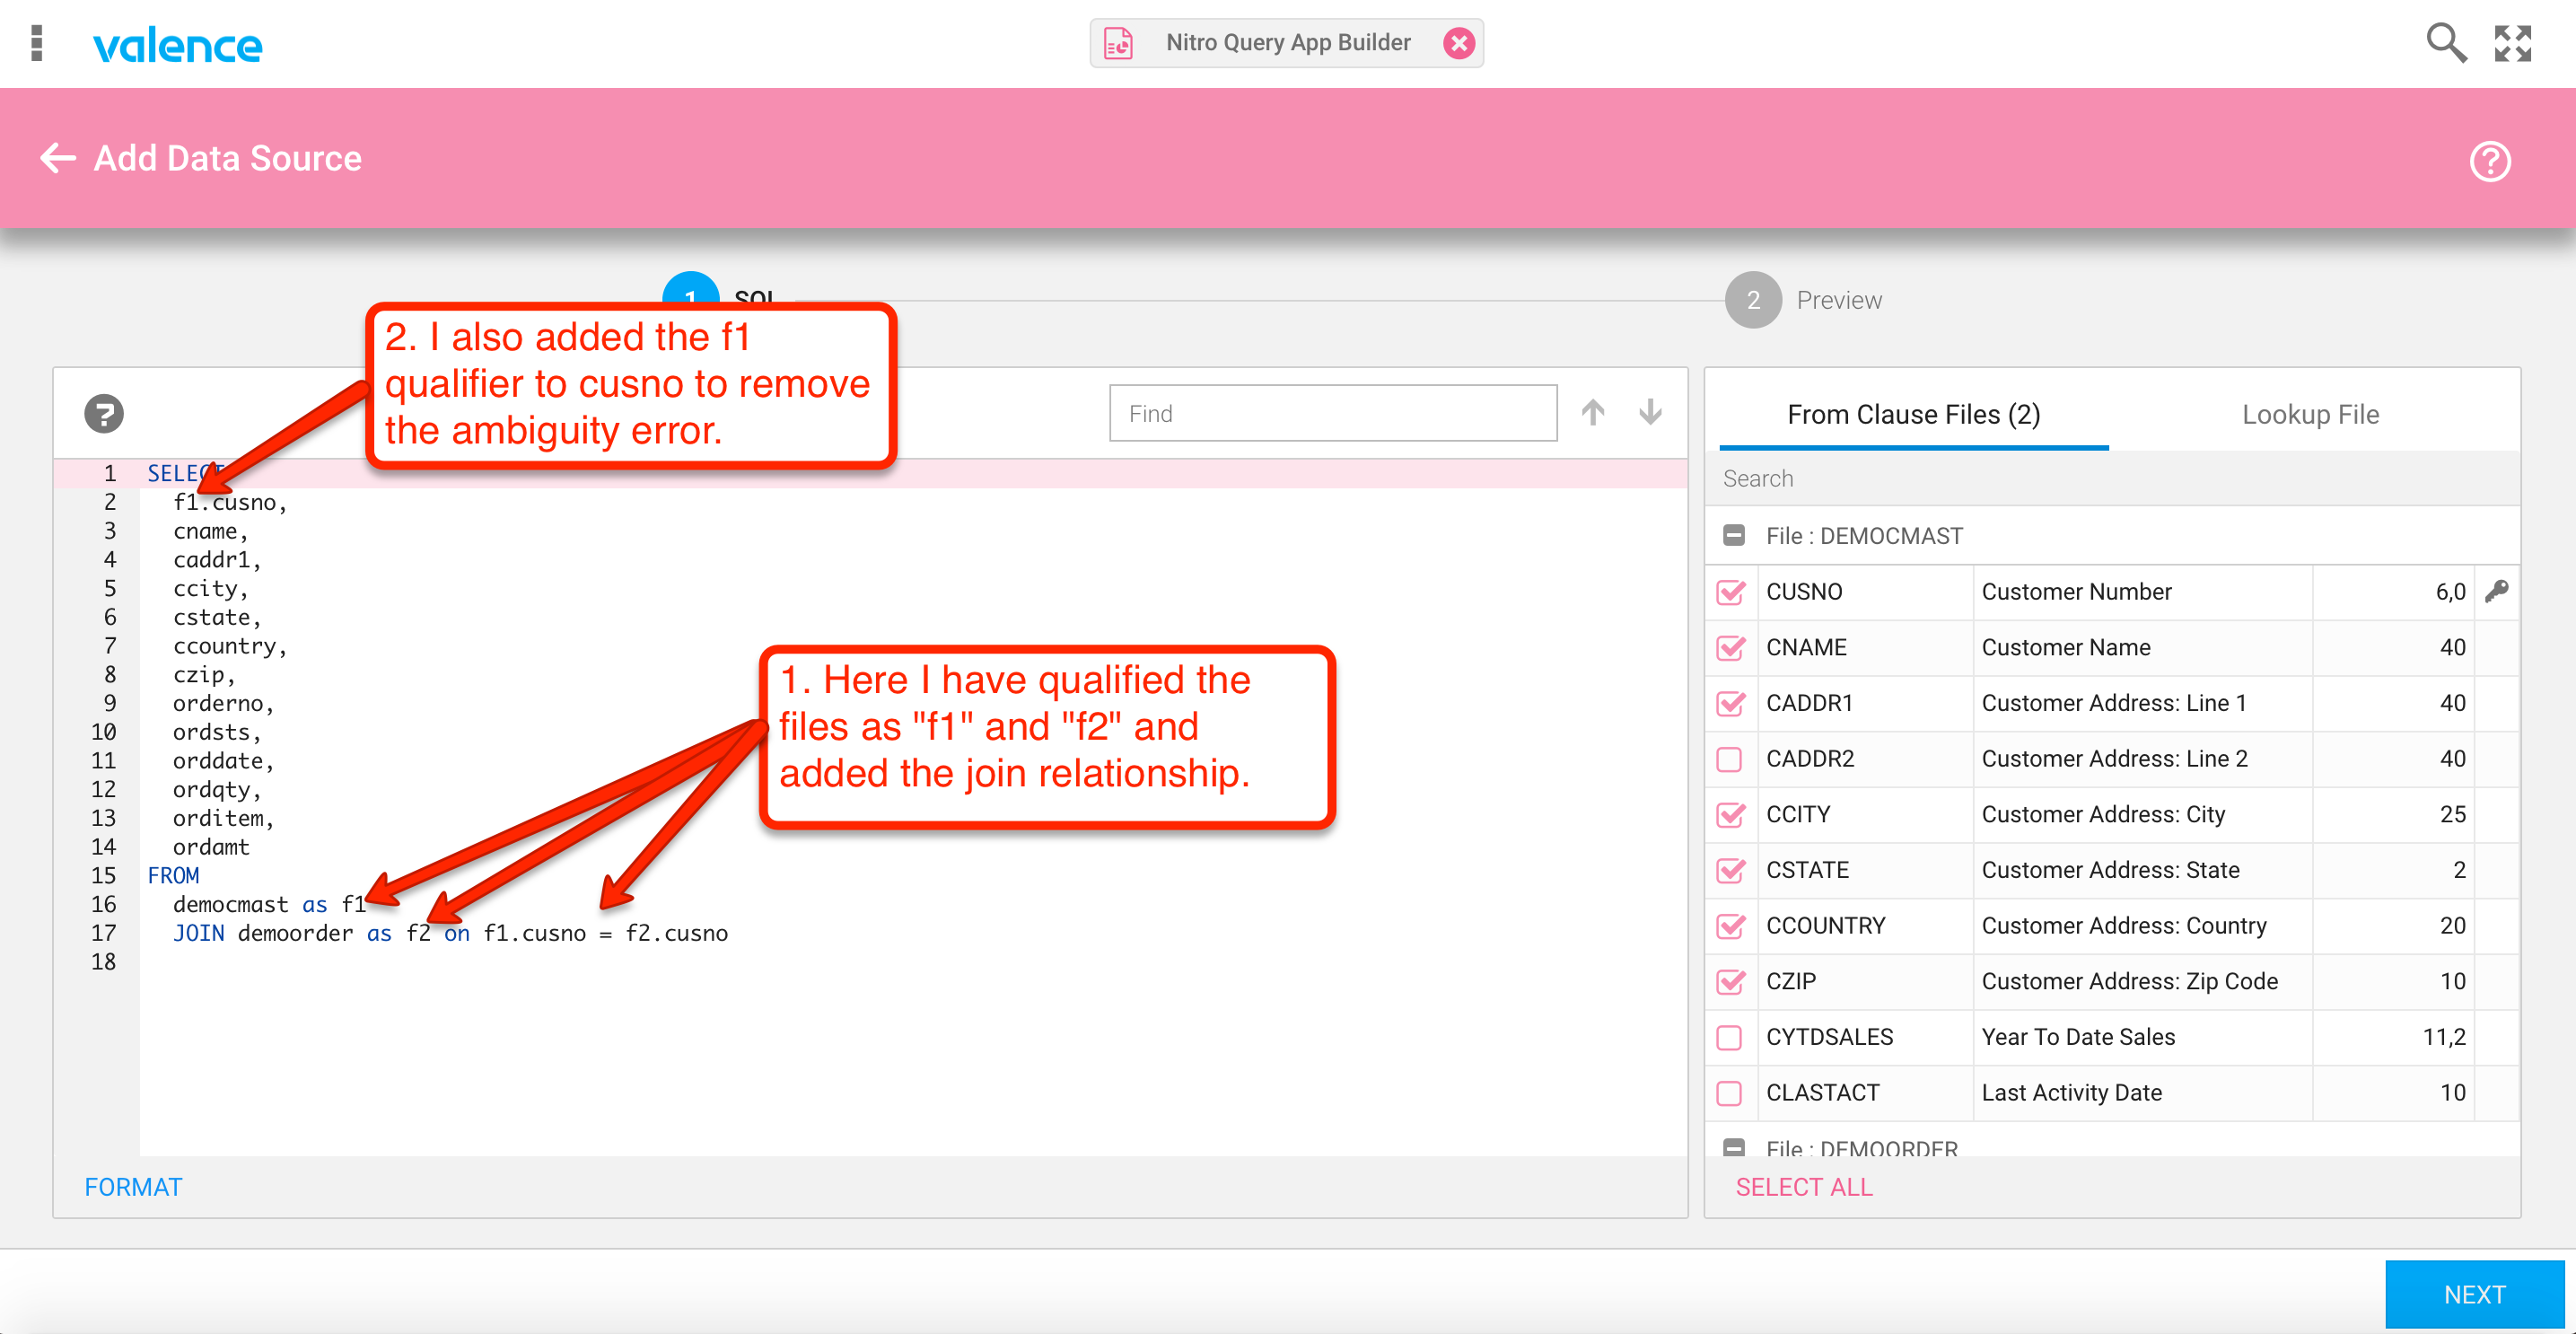
Now we’re at a point where we need to make some tweaks to the SQL statement directly. First off, the SQL parser is letting us know that there’s an ambiguity in the select statement that needs to be qualified. Specifically, the CUSNO field exists in both files, therefore we must clarify which file it should be pulled from. We also need to specify which fields we’re using on the join to the orders file. This is depicted below in figures 8 and 9.

Finally, we’ll use another feature of the SQL parser to help us find the proper columns for the Order By clause. Do this by adding “Order By ” to the end of the statement, then hit the F4 key. This will present you a list of all the fields available from the files specified in the From clause, then you can simply click on the desired field and it will be added to the statement.

Finally, we hit the Next or Preview button to verify our SQL statement works, then save it.
And that’s all there is to it! We find most people can build out data sources much faster using the SQL parser, though of course you can still use the “Classic” approach to create the data source using the 7 Step breadcrumb process.
Note: If you’re new to Nitro Query, the next step to creating a grid app your users can execute is to (1) marry your data source to a grid widget, then (2) pop the widget into a Query app. Once your grid widget is created, you would then click the Queries tab, click the Plus icon to create a new Query App, add your newly created Grid Widget to the Query canvas, then click Save. A short video demonstrating that simple process is in production and will be posted soon.