In our previous newsletter tip we explored how to create an app in which users can upload files to specific locations on the IFS. Now we’ll take a look at how to create a separate app that can put those uploaded files to use, in this case rendering them as thumbnail-size images inside a grid column.

A common application for this concept could be in a list of product images, perhaps as part of a product master maintenance app, or to assist users in picking items from a list of products. Supplementing mundane text like product numbers with corresponding images can be a great tool for helping users find what they’re looking for, or to feel confident they’ve made a correct selection.
To illustrate this concept, we’ll use the example product master file included with Valence, DEMOPMAST. The first step is to go into Nitro App Builder (NAB) and create a simple data source over the file. If you’re not already familiar with creating data sources. One thing we’ll be doing differently here is adding an on-the-fly calculated field to hold an image path based on the product number. If your own system’s product master equivalent already had a field to hold the product image path, you could use that instead.
In the case of the Valence examples, images for each item record in DEMOPMAST are stored in IFS path “/resources/images/nabSamples/” (relative to the Valence directory), with a jpeg file name equivalent to the product number. So the image for, say, product HEXNUT375 would be pulled from /resources/images/nabSamples/HEXNUT375.jpeg. With that in mind, we’ll include that path in our data source’s calculated column with the following SQL statement:
SELECT prdno, descp, type, class, uom, price, onhand, ‘/resources/images/nabSamples/’ || trim(prdno) || ‘.jpeg’ AS imagePath FROM demopmast
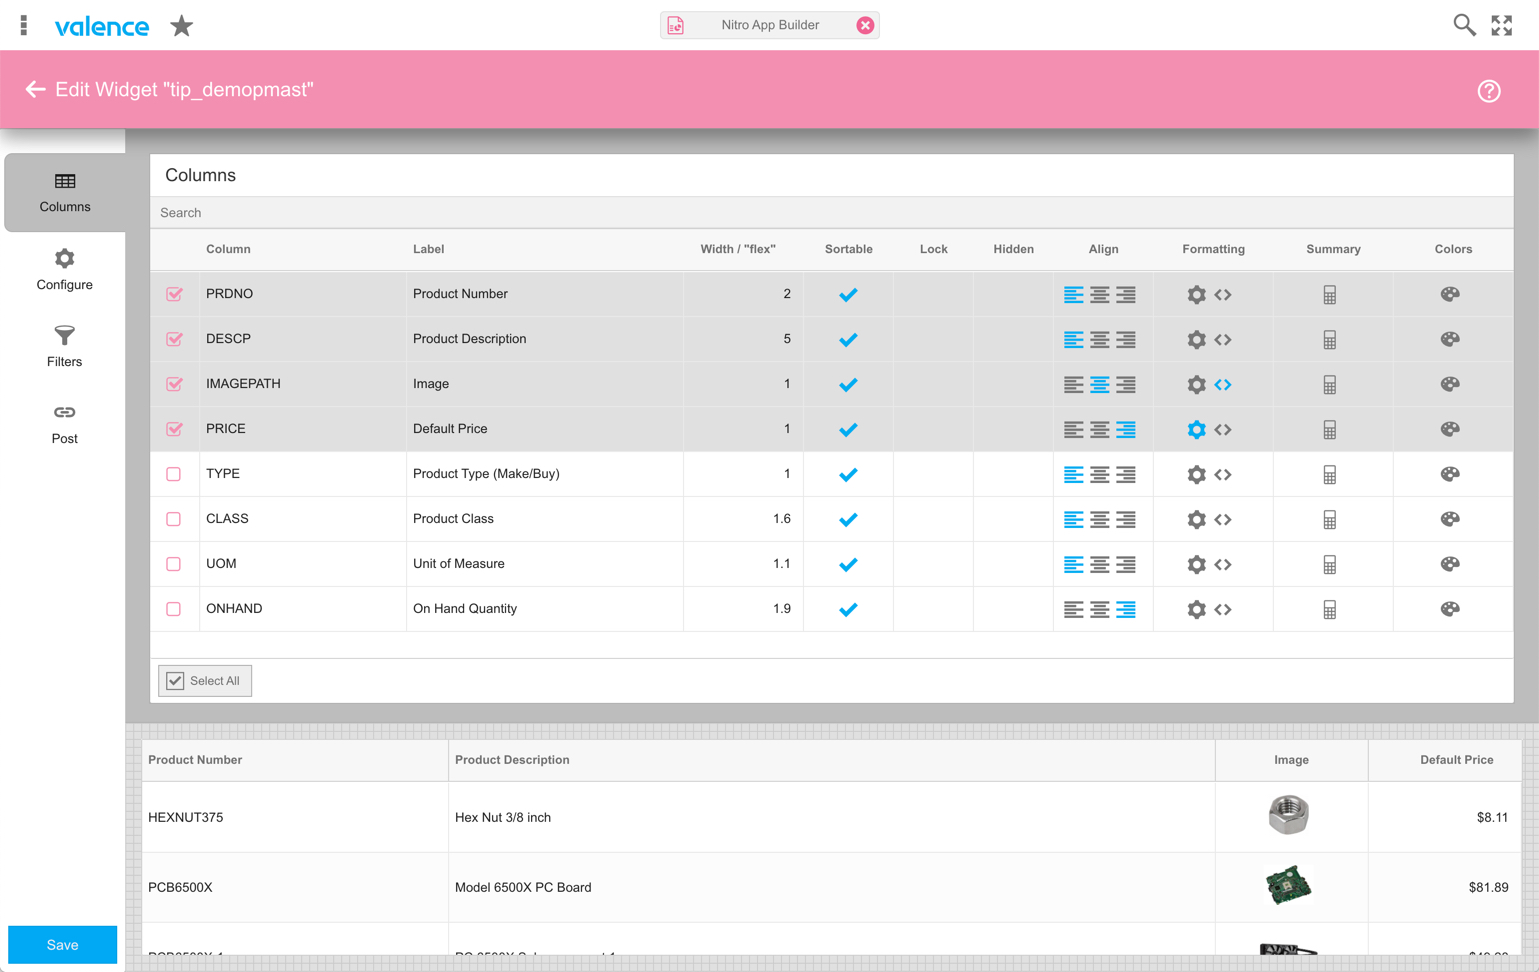
After saving that data source, the next step is to create a grid widget over it. In addition to selecting the appropriate columns to display, adjusting column widths, and applying the typical column rendering configurations (such as formatting the price to show as currency), you’ll also want to create a special renderer over the ImagePath column to let NAB know it should show an image. To do that, click on the <> symbol adjacent to the IMAGEPATH row, and enter the following code to configure the image column:
return ‘<img style=”max-height:40px;” src=”‘+rec.get(‘IMAGEPATH’)+'”>’;
This simple JavaScript line converts the image path to HTML for showing an image. The max-height style constrains the image to a relatively small size. You may also want to center the column to be centered. The widget configuration should look something like this:
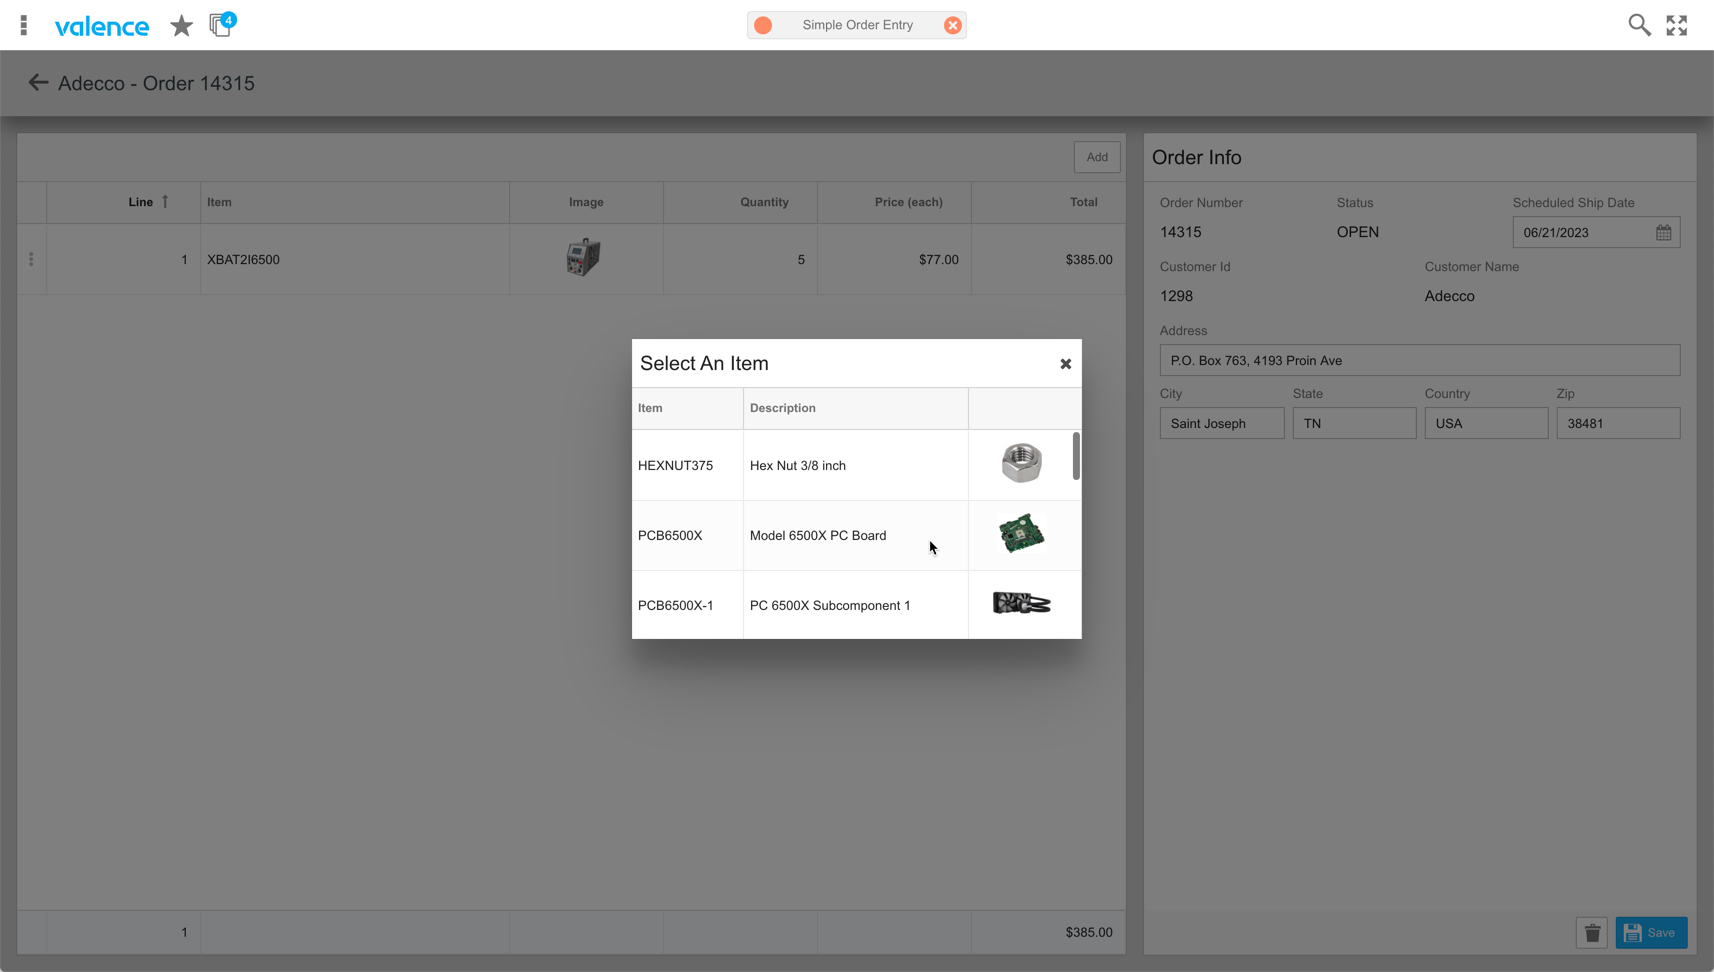
You can now put this widget to use in your apps as a mechanism to lookup a product. You can see an example of this in the Simple Order Entry example app when you click on the “ADD” button to add a line to an order.
Rendering images in grid columns is just one of many ways to put stored images and files to use. For additional image rendering ideas, including showing an image or PDF file inline and/or downloading it to the browser, check out this Developer Diaries video from May 2020.